

Can you tile over tile? Yes. Well, sometimes.
The answer really depends on a few important factors. Read on to learn if you can tile over tile and when it’s best to tear out your existing flooring.


We partnered with Networx to save you big money on your next home renovation project. And quotes are free!
Can You Tile Over Tile?
Home improvement projects are rewarding and well worth your time and effort since they can add a great deal of value to your home.
But to reap the benefits of all that hard work, you absolutely must do the job correctly, no matter what it is.
Changing your flooring is one of the most transformative do-it-yourself home improvement projects. New floors completely change the look and feel of any space.
But it’s also tricky.
One common question that many people have is whether old floors must be removed before a new one is laid down. With certain flooring, it’s obvious, such as carpet; of course, that must be removed first.
But what about tile? Can you tile over tile?
In this article, we’ll cover all of the factors that you must consider to answer this question and make the right decision for your home. Then we have a step-by-step guide for the best way to go about the job.
The Short Answer: Yes, But…
The short answer to the question of whether you can tile over tile is yes, you can.
That being said, there are a few caveats and conditions to consider before you get started.
What to Look for Before Tiling Over Tile
Jkdecode/Shutterstock
There are a few conditions and other items that you need to make sure are present before deciding whether to remove your old tile or simply lay new tile on top of it.
The old tiles must be in fairly good condition. Let’s go into more detail about how to conduct a thorough inspection of them.
The tiles must be free from moisture.
If moisture is building up underneath the tiles or if water has damaged whatever flooring is underneath, you may need to remove the old floors, remediate the damage, and lay down new tile.
Unfortunately, this is a bigger and more expensive undertaking.
Signs of water damage include:
- Visible mold or mildew growth along the walls or in the grout
- Mold or mildew smells in the space, particularly after a thorough cleaning
- Uneven surfaces, where the tiles appear to be bubbling, especially at the edges
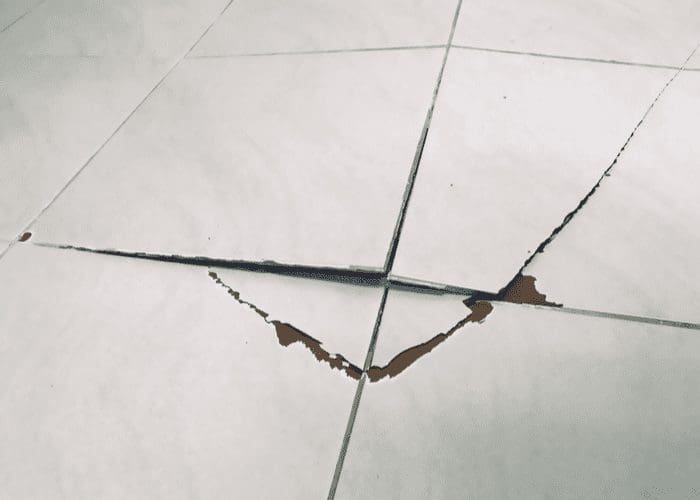
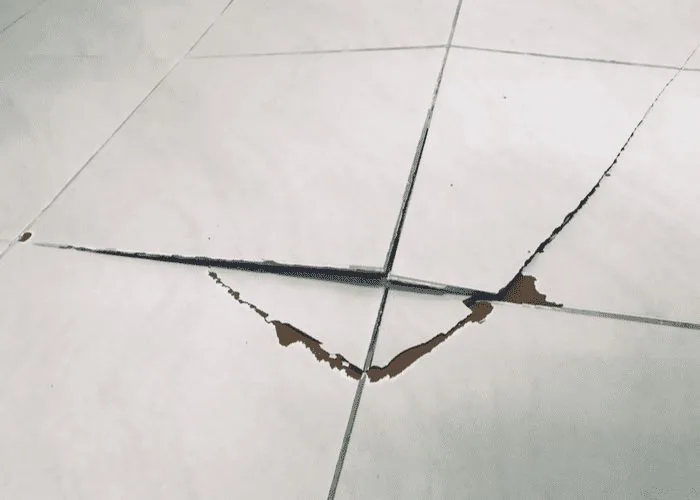
- Cracked tiles, especially if they’re also bubbling
The surface must be completely smooth.
Whether there is damage from water, improper installation, or something else, you must fix it to have an even base layer on which to work when laying down most types of new flooring.
Conduct a visual inspection of the floors for signs of unevenness. You can also use a leveler placed around the space strategically to make sure. Or, lay a tennis ball on the tile in various places and see if it rolls.
It must be free from extensive damage.
You probably wouldn’t be retiling if your existing floors were in pristine condition, so some chips or other blemishes here and there are okay, especially if you already know how they got there.
However, if there are cracks or other extensive (or even moderate) damage, you may want to call a professional to inspect before you begin.
If Your Old Tile Is Damaged
Before we jump into how to lay new tile on top of old, let’s cover what to do if your old tile is damaged upon inspection.
You actually have a few choices:
- Rip up your old tile to inspect the floor underneath. There may be no water damage or underlying cause, but it’s best to be sure. Check out the video above on how to do this job right.
- Hire a professional to do an inspection. They may diagnose the cause of the damage without removing the old tile, saving time and money.
- Hire professionals to do the whole job. If you’re a home improvement novice, this option is your best bet. They can do it all: remove the old tile, inspect underneath, remediate any issues, and lay down your new floors for you.
Step One: Prepare for Tiling
As with any do-it-yourself home project, you have to be absolutely sure that you take the proper steps in the right order. The first thing that you need to do is prepare the old tile for the new.
Smooth out any uneven grout with a sander. In addition, repair any loose tiles using tile adhesive. Otherwise, those laid on top of them will slide and move around, making them prone to damage.
Next, prepare the new tile. Very carefully lay out the tiles in the space. Measure and cut them to fit around the walls and fixtures.
Make sure you devise a system that works for you to ensure that the right tiles get laid down in the right places.
Step Two: Lay Adhesive
Now that your floors underneath are ready and the new tile is cut and prepared, you can start the process of tiling. First, you must choose the right type of adhesive.
For rooms or areas prone to moisture, such as a bathroom, use thin-set adhesive or thin-set mortar. The best type is mastic adhesive for other areas, such as kitchens, living rooms, and hallways.
You’ll need to lay the adhesive down carefully using a trowel. Create a thin, even layer on a small part of the floor. Do not cover the entire floor at once!
Otherwise, the adhesive will begin to dry faster than you can apply the tiles, and you will have a very big mess on your hands!
Don’t forget to score the adhesive using the edge of your trowel. This helps the tile adhere better. Also, be sure to account for the old grout and variations in depth because of it.
Step Three: Lay Down the Tiles
As you prepare the adhesive in a small part of the room, lay down the tiles as you go. Place each tile carefully and firmly on the scored adhesive.
Make sure you’re putting the correct tiles in the right places; you may want to work around fixtures first to ensure that the tiles you have already cut fit properly.
Step Four: Spread, Score, Lay, and Repeat
You’ll need to repeat steps two and three over and over until the entire space is complete. Spread the adhesive evenly using a trowel, then score the adhesive using the edge of the trowel.
Next, carefully and firmly lay down the tile. We recommend completing the space in one day, if possible. It’s easier to fix mistakes before the tiles are completely set.
Step Five: Seal With Grout
Grout is important because it helps even out the space between tiles, helps hold them firmly in place, and prevents mold and mildew growth by stopping moisture from seeping underneath the tiles.
You can mix the grout yourself, but it is much easier to use pre-mixed.
Step Six: Enjoy Your New Floors
You’ve saved a lot of time and money by laying your new tile on top of the old tile, rather than removing it first. That said, you’ve still put in a lot of work to improve the appearance of your home.
Make sure you take time to enjoy it and show off your new floors to friends and family before tackling your next DIY home improvement project.
We partnered with Networx to save you big money on your next home renovation project. And quotes are free!
So, Can You Tile Over Tile?
Can you tile over tile? Yes and no.
The answer really depends on the condition and type of existing tile and whether or not the floor is level.
When in doubt, we suggest calling a contractor to give you a bid.