
If you’re wondering how to finish a basement, you’re not alone.
Unless you’re a contractor, you’ve likely never done this. But don’t worry—that’s why we built this guide. Read on to learn all you need to know.


We partnered with Networx to save you big money on your next home renovation project. And quotes are free!
How to Finish a Basement: Quick Summary
Finishing a basement can add lots of useful living space while also potentially increasing your home’s resale value. And we think there are nine main steps most basement projects will use. These include:
- Clean and inspect for moisture
- Design and get permits
- Assemble materials and tools
- Install insulation
- Frame walls
- Install electrical, plumbing, and HVAC
- Install drywall
- Install ceiling
- Lay underlayment and flooring
Of course, these are just generic steps; your basement might need a modified version of this list.
In any case, it’s good to know what each one of these encompasses to give you an idea of what type of project you’re really about to undertake.
How to Finish a Basement in 9 Steps

Kelly MacDonald/Shutterstock
It can take anywhere from one to two months or longer to finish a basement. And the project is likely to test the skills of even advanced do-it-yourselfers.
You may want to start with a smaller project, such as building a single wall in your basement to support shelves or a workbench. If that works out, these are steps to the full project.
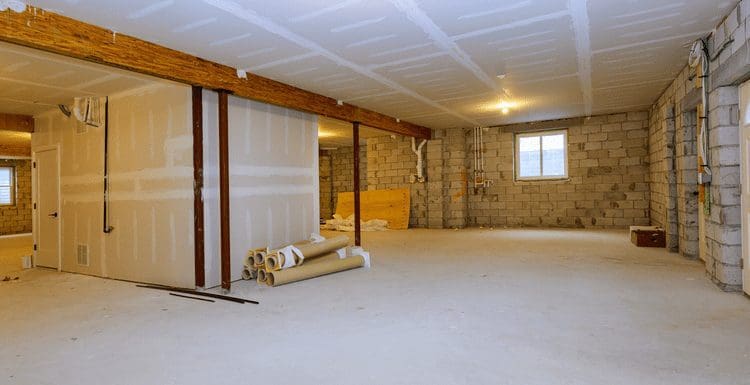
1. Clean and Inspect
Start by removing all the stuff that collects in a basement. You may want to donate some items and put others in a garage or storage unit. Inspect the emptied basement for signs of excess moisture and dehumidify or waterproof as necessary.
While you’re inspecting, make sure items like water heaters and furnaces are up to date with the local building codes. This will ensure that you don’t fail the final inspection.
2. Design and Get Permits
Start your design by sketching the floor plan and main elements, such as bathrooms, dividing walls, and doorways. Your budget will be a guiding influence here. Labor makes up the biggest portion of costs, and who does the labor is the biggest variable here.
Do-it-yourselfers can plan to spend as little as $2,800, while the cost may rise to $33,985 or more if you hire professionals.
Materials are less important, but major features like an added bathroom can be the most expensive item in a basement finishing project. You’ll need to present drawings of what you plan to do before applying for the needed building permits.
3. Assemble Materials and Tools
Every basement finishing project probably calls for a slightly different set of building materials compared to every other basement. Your specific needs depend on your specific design.
However, some commonly needed materials include the following:
- Insulation
- Nails, screws, and construction adhesives
- Seasoned 2 x 4 framing lumber
- Drywall
- Ceiling materials
- Flooring
- Paint
- Wiring, piping, and ducts
- Trim
- Appliances and furnishings, such as sinks and commodes
Some items, such as cabinets and plumbing fixtures, may require weeks for delivery. To avoid frustrating delays caused by missing items, pre-order materials so you have them when you are ready to install them in your basement.
Tools also vary according to the project. Not every basement finishing design will call for tools to install plumbing, for instance. However, the tools needed to complete most basement finishing projects likely include these:
- Caulk gun
- Chalk line
- Circular saw
- Dust mask
- Electric drill
- Gloves
- Hammer
- Hearing protection
- Ladder
- Level
- Paintbrushes
- Safety glasses
- Sawhorses
- Screwdrivers
- Tape measure
- Utility knife
Renting some tools may make more sense than buying them. Many hardware and home improvement stores rent paint sprayers, hammer drills, and other items that might not get used much after your basement finishing project is done.
4. Install Insulation
Insulating your basement helps keep it more comfortable. Many basement finishers choose polystyrene foam insulation.
Trim sheets to fit on the walls of the foundation and between ceiling joists. Fit insulation around obstructions, such as pipes, using small pieces. Glue it all down with construction adhesive.
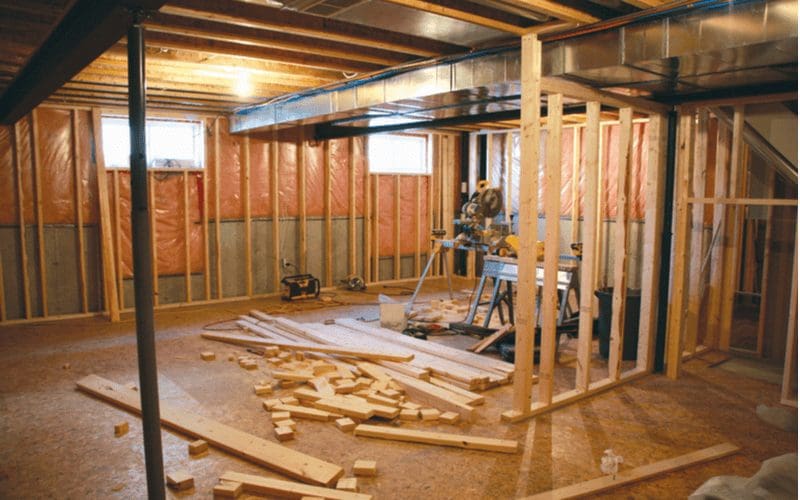
5. Frame Walls
Snap chalk lines four inches from the foundation walls to mark where the top and bottom plates go. Cut the plates to fit from seasoned 2 x 4 framing lumber.
Mark locations for studs every 16 inches on the top and bottom plates. Align the bottom plates with the chalk lines, and anchor the plates to the floor using adhesive and masonry screws.
To provide a place to attach the top plates:
- Cut 2 x 4 blocks to fill in spaces between the ceiling joists.
- Nail blocks to the joists.
- Align the top plates with the bottom plates using a straight 2 x 4 and level and screw the top plates to the blocks.
Cut studs to fit between plates and nail them to the top and bottom plates at marked 16-inch intervals. If your plan calls for interior partition walls, measure and mark the top and bottom plates for these using the chalk line. Install plates and studs.
As you frame the basement, you’ll need to work around ducts, pipes, and similar obstructions. Frame rough door openings so they are 2 1/2 inches taller and wider than the doors.
6. Install Electrical, Plumbing, and HVAC
Wiring, water and drain pipes, and heating and air conditioning ducts go in next. These are usually best installed by a licensed professional who is up-to-date on local building codes.
7. Install Drywall
Hang sheetrock, cutting any needed access holes for switches, valves, and other obstructions. Trim the sheets so the edges end on a stud. Fasten to the studs with drywall screws. Caulk over screw heads and seams.
Cover seams with drywall tape. Smooth drywall mud over seams. Measure, cut, and nail trim around doors, windows, and other openings. Texture drywall if desired. Remove any dust and dirt from the walls and paint.
8. Install Ceiling
If you want an unfinished look for your basement ceiling, you can skip this step. On the other hand, if you want to cover exposed pipes, valves, wires, and other items, you can install drywall on the ceiling using the same technique you did on the walls.
Another option is a drop ceiling using acoustical tiles. These commonly come with installation kits and instructions.
They don’t look as complete as drywall, but they are a great way to save money if you’re remodeling your basement on a budget.
9. Install Flooring
The last item to install is the flooring. You may install a subfloor first by gluing down polystyrene insulation and then screwing down plywood sheets.
This method is suitable for carpet with a foam pad underneath. Otherwise, snap-together laminate flooring can be installed directly on the existing floor.
Don’t Forget the Punch List
If you hire a professional to do your basement project, as the completion date approaches, a punch list will document any work that’s not finished according to specifications.
Common items on a punch list include cracks around doors and windows, drywall joints that are still visible, places where the paint didn’t cover the wall, gaps in drywall around outlets and valves, and so forth.
Seeing that punch list items get corrected ensures happiness with the finished work.
A punch list also works with do-it-yourselfers. Many DIY projects never quite get finished. Reminding yourself of undone details and minor fixes with a punch list encourages you to complete the job and wind up with a basement that meets all your requirements.
We partnered with Networx to save you big money on your next home renovation project. And quotes are free!
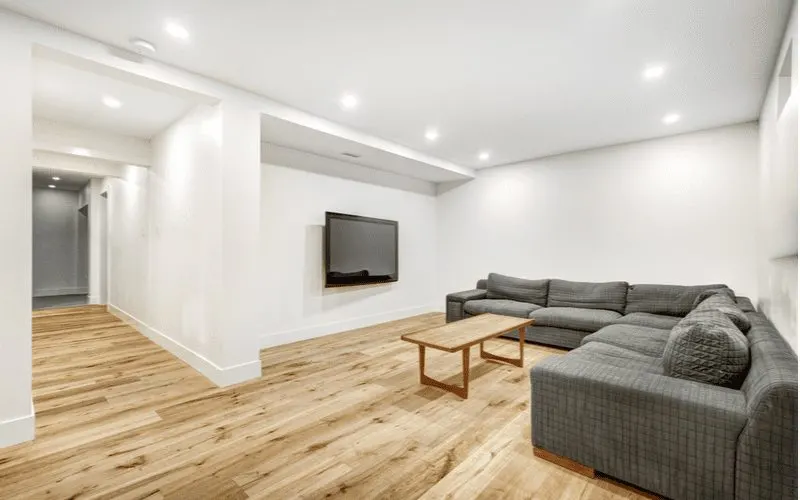
So, How Do You Finish a Basement?

Anatoli Igolkin/Shutterstock
Your basement can be much more than a place to store off-season or unneeded items and keep water heaters, furnaces, and laundry equipment.
With some imagination, a modest financial outlay, and some skill at carpentry, trim work, and painting, you can add a highly functional and fun room to your home.
Whether your vision is of a pool or ping pong table, wet bar, media room, workshop, or other purpose, finishing your basement can make it come true without the much higher cost of a complete addition.