
Wondering how to install laminate flooring?
You’re in the right place. We’ve rounded up the best tips, tricks, and know-how to help you take control of your next flooring project. Read on to learn all you need to know.
How to Install Laminate Flooring in 9 Steps
Laminate flooring is versatile, available in tons of colors and styles, and easy to install yourself.
Once you learn how to install laminate flooring, you’ll be able to quickly beautify any room in your home with just a few tools and a bit of elbow grease.
Below, we’ll cover everything you’ll need to know about how to install laminate flooring. Here’s what you’ll need to do to install laminate floors in your home:
- Demo your existing flooring
- Get your subfloor ready
- Layout the flooring
- Install underlayment
- Install your first row of planks
- Rip the last plank to fit the room
- Repeat steps 5 and 6 to complete the room
- Rip your last row of flooring
- Complete the installation
Follow the steps below, and you’ll be well on your way to enjoying a gorgeous new laminate floor.
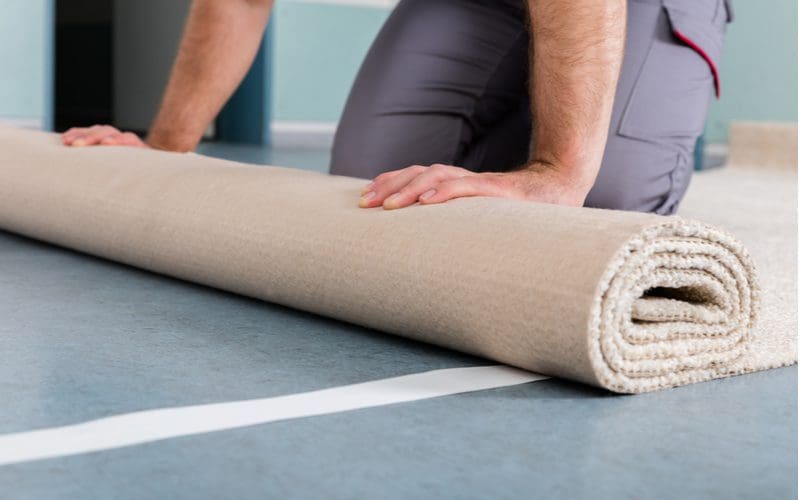
1. Demo the Existing Floor

Andrey_Popov/Shutterstock
The first thing you’ll want to do is rip out the existing flooring in the room where you’ll be installing the new laminate.
You may have already completed this step, but if you haven’t, here’s what you’ll want to do. Start by removing any baseboard trim or heating covers from the bottom of the walls.
If you have baseboard heating, you’ll need to work around the heaters as you install the planks.
Removing the covers helps ensure they aren’t damaged during the installation process. Remove any trim work carefully if you plan to reuse it once the new flooring is in.
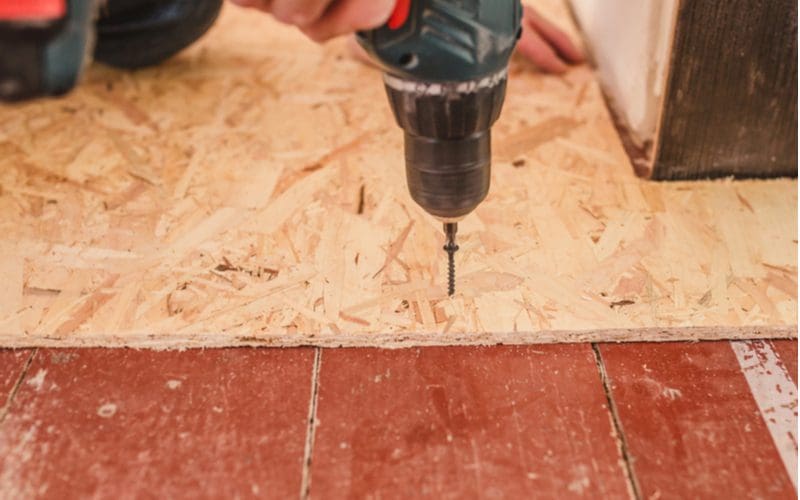
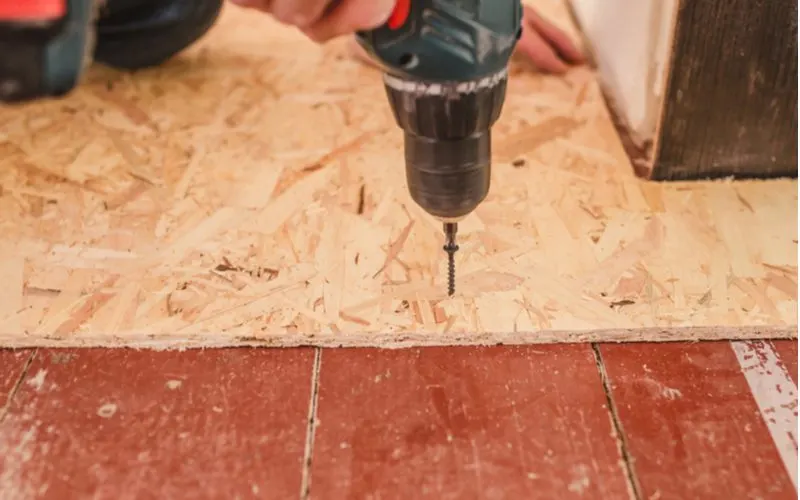
2. Prepare the Subfloor
VanoVasaio/Shutterstock
One of the best characteristics of laminate flooring is that it’s a “floating” installation. There’s no glue, grout, mastic, or hardware necessary to complete the installation.
Since it “floats” over the subfloor, laminate is an excellent choice for installing over a damaged or uneven subfloor. In many cases, you can install laminate flooring over an existing floor.
If the existing flooring is carpet or badly damaged, you’ll want to rip the existing floor out to prepare for the laminate.
Depending on the subfloor’s condition, you may also have to rip it out and replace it with thin plywood such as Ecoply before beginning the laminate installation.
Once you’re confident in your subfloor preparation, carefully sweep or vacuum the room so that it’s as clean as possible before you start the installation.
3. Lay Out the Flooring
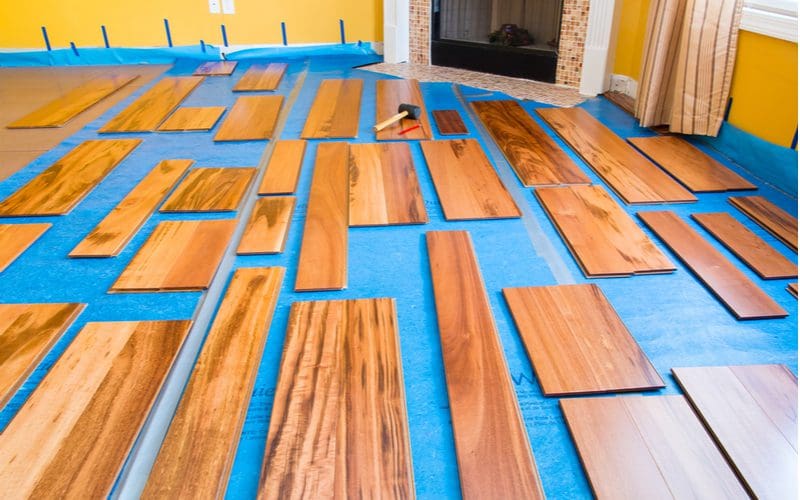

Irina Moss/Shutterstock
Next, you’ll want to lay out some flooring to get a better feel for how it will look once the installation is complete.
Butt the planks up end to end with one another, and don’t lock them into place, as it will be difficult to separate the planks once you lock them together.
Once you have a feel for how things will lay out and you’re happy with how it’s going to look, pick your planks up and stack them neatly to the side so you can begin working.
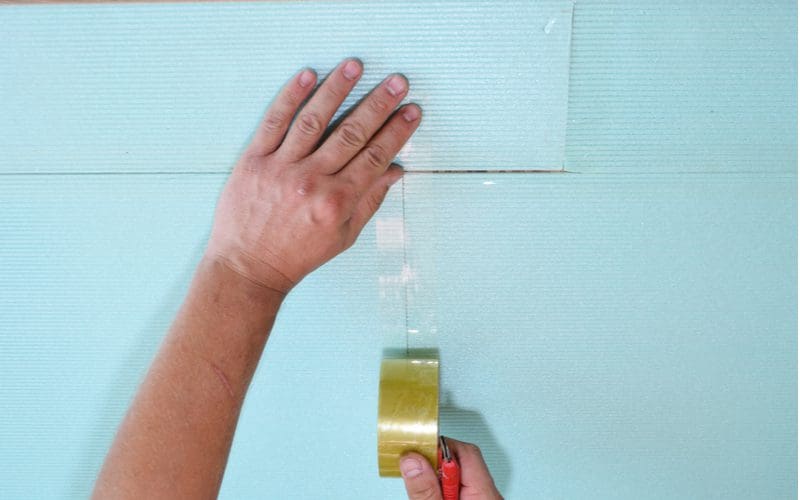
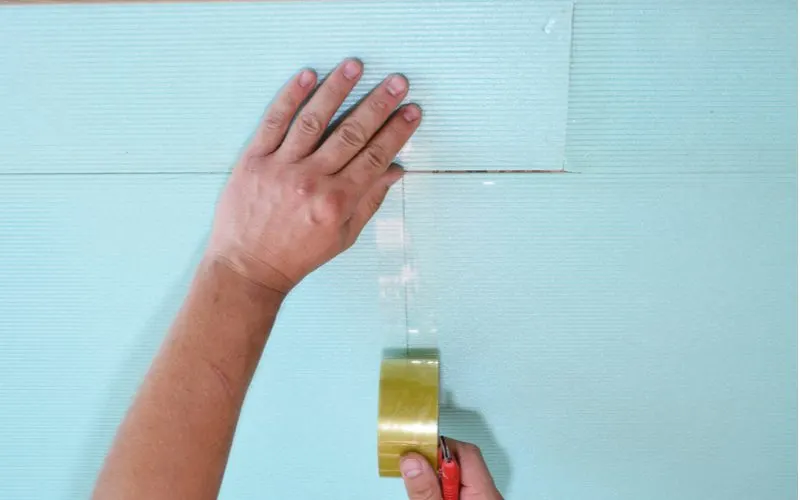
4. Install the Underlayment
Radovan1/Shutterstock
While you can install laminate flooring directly over the subfloor without underlayment, this is not the best idea.
An underlayment, which is usually a thin layer of foam, serves several helpful purposes. Underlayments act as a sound and thermal barrier, and they also help to level out any minor imperfections in the subfloor.
If you’re installing laminate flooring in a basement or other wet environment, you’ll want to install a vapor barrier to prevent moisture from damaging your new flooring material.
Some underlayments have a built-in vapor barrier to protect against moisture.
If you’re installing an underlayment without an integrated vapor barrier, install some heavy plastic sheeting and tape it down along the perimeter of the room before installing your underlayment.
To install the underlayment, roll out each piece of underlayment across the floor and use a utility knife to cut the foam to fit the room. Most rooms will require several pieces of underlayment to completely cover the floor.
Butt each section of underlayment together so that they’re flush with one another, and tape the seams to secure the pieces together.
Some underlayments come with self-adhesive strips already attached to one side of the foam. In that case, you’ll use the strips to secure the pieces together instead of tape.
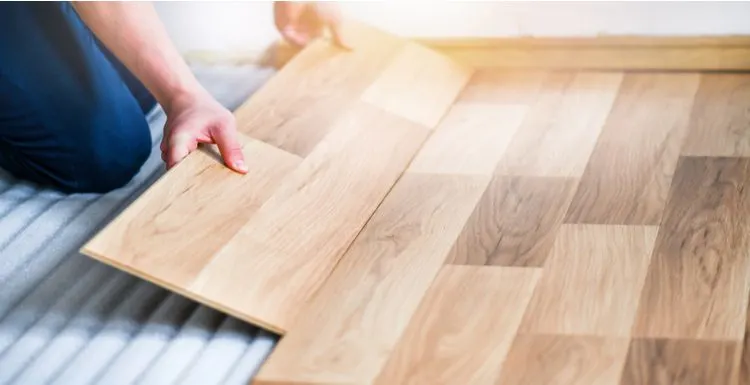
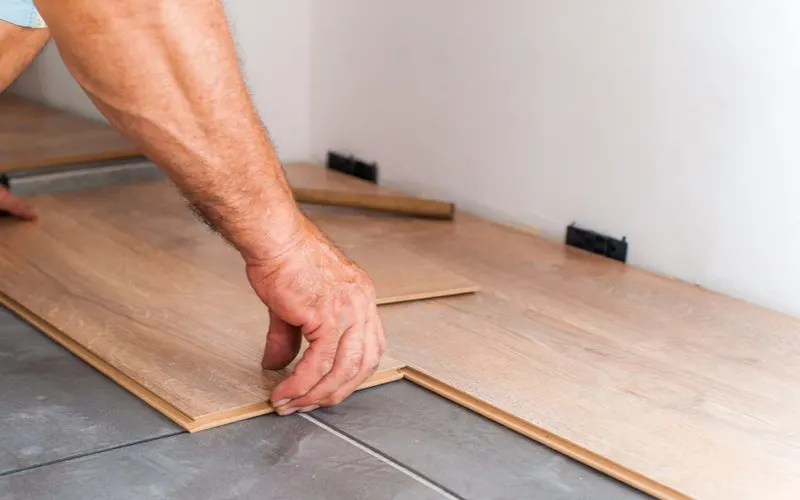
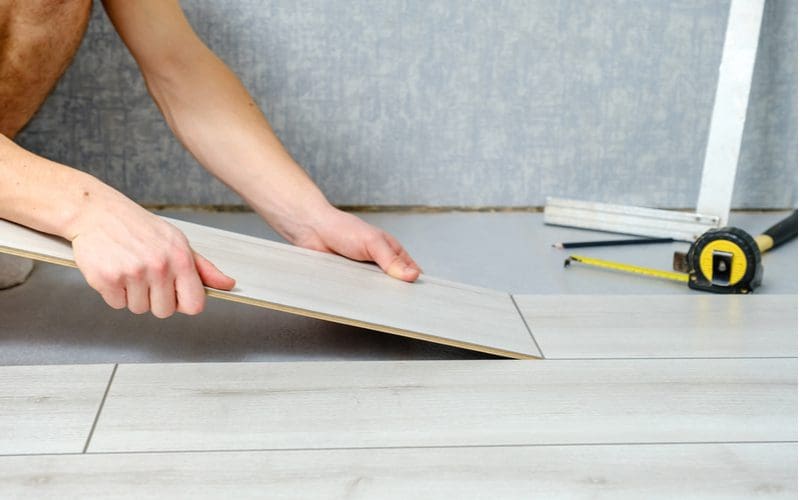
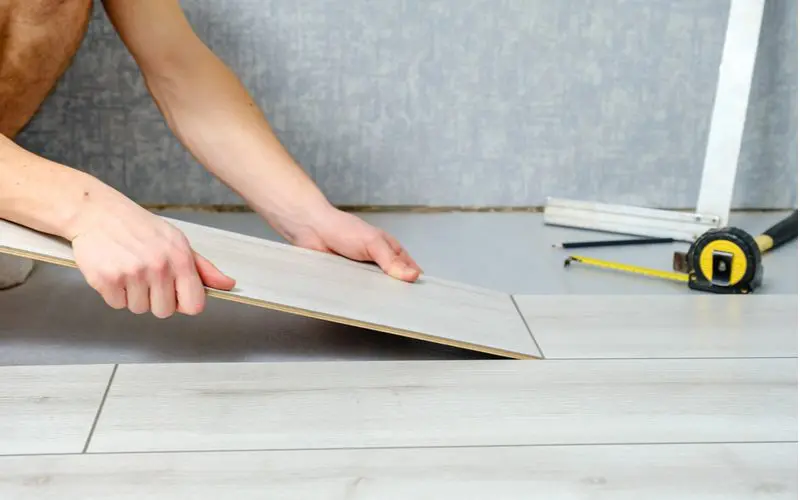
5. Install the First Row of Planks

Abrym/Shutterstock
With your underlayment in place, you’re prepared to begin the installation. Your first step will be to trim off the tongues from the planks that will make up the first row.
Depending on how hard the laminate is, you may be able to cut the tongues off with a utility knife. If that doesn’t work, reach for the chop saw for this step.
Once you’ve trimmed the tongues off, lay out your first row of planks according to the manufacturers’ specifications.
Most manufacturers recommend 1/4-3/8″ of space between the wall and the planks to provide room for the planks to expand or contract. Use pieces of scrap wood to ensure you have the proper spacing between the wall and the first row of planks.
As you lay additional planks out, use a rubber mallet and a tapping block to lock each plank into its neighboring piece.
Once your first row is roughly in place, it’s a good idea to snap a chalk line at the edge of the row so you can measure the distance between the plank and the wall.
Some walls aren’t perfectly straight, and you must compensate for any wall imperfections at the beginning of the installation. The grooves of the first row must be perfectly straight to ensure an easy installation.
If you find any areas where wall imperfections prevent the planks from sitting perfectly straight, adjust that plank towards or away from the wall and remeasure to ensure the first row is straight.
Once everything lines up, use a rubber mallet and tapping block to lock each full plank into its neighboring plank until you reach the wall.
Chances are, you’ll need to cut down the last plank in the row to allow it to fit into the room. Measure the distance between your last full plank and the end of the wall. Take a full plank and mark where you’ll need to cut to allow the plank to fit.
Be sure to account for the manufacturer-specified gap between the wall and the final plank. Be sure to measure from right to left so that your cut piece will have a tongue end to attach to its neighboring plank.
Use a chop saw or skill saw to make your cut, and lock the final plank into place. A pull bar is beneficial for leveraging the final plank in the row into place.
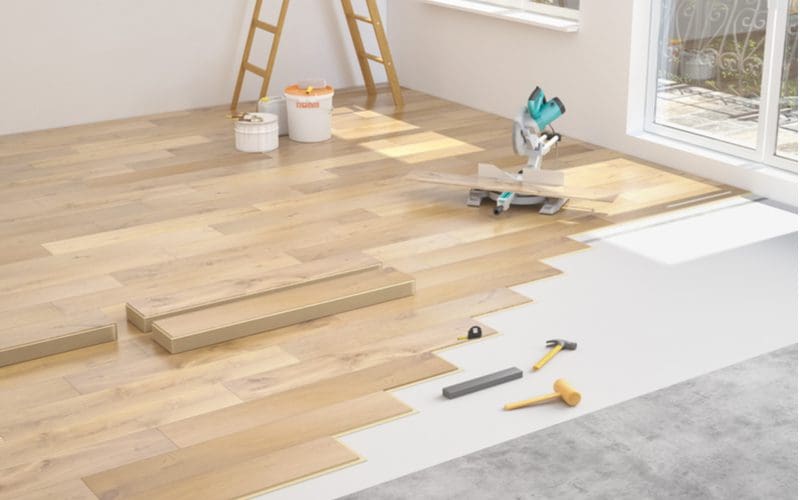
6. Continue Installing Rows
Serhii.suravikin/Shutterstock
Begin your next row using the piece you cut to finish the first row. Using this cut piece for your first tile will ensure that your seams look natural and that the floor is as strong as possible.
Continue installing planks to complete the row, cutting the last plank to fit. Repeat the process for all the remaining rows needed to complete the installation.
7. Rip the Last Row of Flooring

2M Media/Shutterstock
Unless you’re incredibly lucky, you’ll need to rip the final row of planks to fit the last row into the room.
Start by measuring the distance from your last row of planks to the wall, and be sure to account for the expansion gap. Once you know the width you need to rip your planks to, mark each plank so you know where to cut.
Your excess wood should be coming from the tongue side of the plank, as you’ll need the groove side to lock in the planks. Rip each plank using a circular saw, chop saw, or skill saw so you can finish the installation.
Install the last row of planks using the same technique as the previous rows. The final row is always the most tedious, as you’ll be working with limited space.
With some patience and a bit of elbow grease, you’ll be able to get that last row installed in no time.
8. Complete the Install


Artazum/Shutterstock
Once you install the last row of planks, all that’s left to do is reinstall any baseboard molding or heater covers and enjoy your beautiful new room!
Things to Consider
Before you begin your project, here are some tips and tricks you’ll want to lean on to ensure a fast and painless installation.
- Take time to make sure the subfloor is in the best condition possible. Use floor patching on any low spots that are greater than 1/8 inches.
- Allow the planks to acclimate to the room you’re installing them in for 48 hours before the installation. This process ensures the wood has time to expand or contract before you install it.
- Install the underlayment in the opposite direction you’re installing the planks. This method helps to eliminate bubbles or creases in the underlayment as you lay the planks.
- Invest in a laminate shear to make cutting planks easier while eliminating sawdust and trips back to the miter or chop saw.
- Wear knee pads to make the installation much more comfortable.
So, How Do You Install Laminate Flooring?
Laminate flooring is an attractive alternative to ceramic or hardwood, and it’s one that any DIYer can install on their own in about a day, depending on the room’s size.
Follow the steps above, and you’ll have a gorgeous new floor without spending thousands on a professional installer.