
Wondering how to install hardwood floors? You’re in the right place.
We’ll walk you through the steps to take, the products to use, and a few things to consider before installing them in your house. Read on to learn more.
Wondering How to Install Hardwood Floors?
Behind the rich, polished gleam of every hardwood floor lie hours of effort spent planning and installing the lustrous planks.
While it’s not the easiest improvement job you’re ever likely to take on, installing a hardwood floor is within the abilities of many moderately skilled do-it-yourselfers.
Installing a hardwood floor requires selecting and assembling materials and tools, prepping the subfloor, laying and fastening the planks, and finishing by re-installing the moldings and transition pieces.
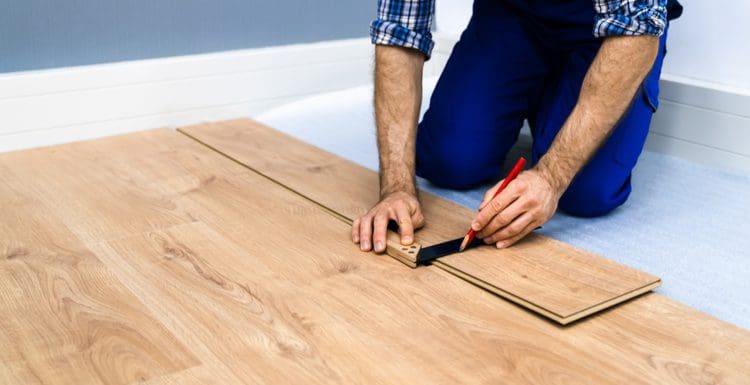
Types of Hardwood Floors


Andrey Burmakin/Shutterstock
Hardwood floors come in three main varieties. Each has special features that affect the installation. Here they are:
- Click lock. Installation of these floors, also called floating floors, is relatively simple and fast. Click-lock flooring planks are usually made of engineered wood. Installers connect planks by pushing a tongue on one board into a groove on another until the locking system clicks. Click-lock flooring can be installed on a cement subfloor, which can help reduce costs.
- Glue down. This flooring type takes its name from the adhesive used to stick planks to the subfloor. Glue-down flooring planks are often made of engineered wood and may click together, similar to click-lock plans.
- Nail down. The most permanent way to install a hardwood floor involves nailing the flooring planks to a plywood subfloor. This method takes more time, however, and requires a wooden subfloor. If no subfloor is already there, adding one can hike the cost of the project.
Each type of flooring calls for its own unique installation techniques. For instance, when applying adhesive to a glue-down floor, the installer puts only enough glue on the subfloor to lay down a few rows of planks at a time.
Spreading more risks the glue setting before planks can be applied. Click-lock planks only need nails for the first row or two. Later rows are secured by locking them to the adjacent planks.
Nails used to secure nail-down floors have to be countersunk and covered by wood filler if they still show.
Still, all hardwood floor installations also share some common features. The following steps are generally applicable to any type of hardwood floor.
How to Install Hardwood Floors in 9 Steps
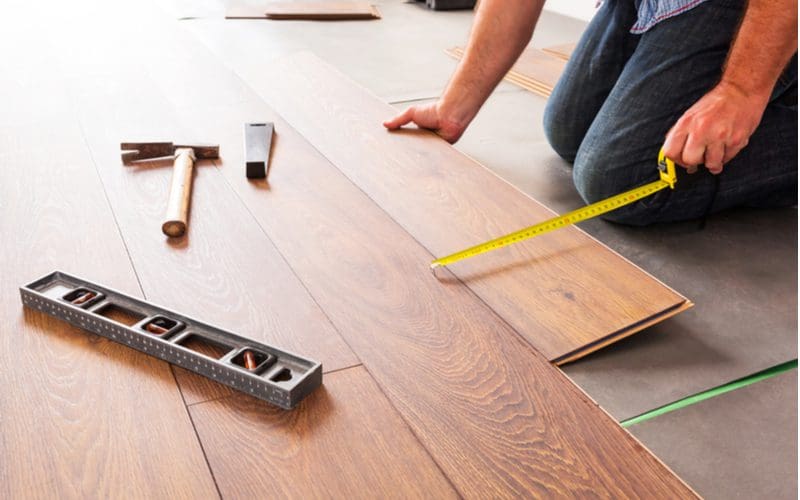
Patryk Kosmider/Shutterstock
Installing flooring begins with deciding what type of flooring to install. Use the characteristics given above to guide this decision. After that, here’s what you should do:
1. Gather Tools and Supplies
Hardwood flooring, transition pieces, and spacers. Order flooring by square feet, adding 5 percent more than the room size. This allows for shrinkage due to cuts and discarding warped or unusable planks.
You’ll also need transition pieces. These special trim items cover up gaps between new hardwood flooring and tile or carpet. Get spacers too. These half-inch pieces of wood go in an expansion gap between the wall and the new flooring.
They allow for swelling of the wood due to changes in temperature and humidity. Supplies for a nail-down floor include nails and wood filler. Either 6d or 8d flooring nails will work. The wood filler should match the color of the flooring.
Tools for nail-down floors include a hammer, nail punch, flooring nailer, drill, and bits. Other tools that come in handy for any type of floor include:
- Plastic or rubber mallets to tap planks
- Pry bar to remove molding and push planks together
- Table saw to trim planks
- Gloves
- Eye protection
- Knee pads will make working on the floor more comfortable
- Consider hearing protection if you are using an electric saw in a confined area
- A jigsaw can simplify making complex cuts to fit around a column or fireplace
2. Prepare the Subfloor
To get the room ready for its new floor, remove the baseboards and molding. You should also get the hardwood ready for installation, leaving the unboxed planks in the room for a few days.
This lets the wood acclimate to the space’s moisture level and other variables that could affect fit.
3. Arrange the Planks
Open the boxes of planks and arrange them as you plan to install them. This lets you mix and match planks for different boxes, so sections of the room don’t show different colors.
Arrange planks so endpoints on adjoining rows are separated by at least six inches. The shoe molding should cover small gaps along the edges.
4. Lay the First Row
Select the straightest planks for this row. You can start the first run of planks in the center or along the longest wall. Snap a chalk line between nails to give you a straight edge.
If it’s along a wall, place expansion spacers between the wall and the floor. Place planks so the tongue is on the side away from the wall.
5. Pre-Drill First-Row Pilot Holes
Drill pilot holes along the edge of the wall. Space pilot holes six inches apart and one-half inch from the edge.
6. Nail Down the First Row
If the first row is along the wall, drive its nails with a hammer. With later rows, you’ll have enough room to use the floor nailer. Use a nail punch to countersink the nails and nail filler to cover nail holes along the wall.
Hammer nails on the other edge through the tongue at a 45-degree angle. Use the nail punch to countersink nails below the wood surface. Take care to avoid interfering with the tongue-and-groove connection with the next row.
7. Lay Second Row
Place the second row so the tongue of the first row fits in the groove. Make sure points where plank ends butt together occur at least six or more inches from endpoints on the first row. If necessary, cut the planks. Tap the plank edges with a mallet to tighten.
8. Nail Down the Second Row
You won’t need to nail through the edge closest to the wall for this one and the following rows. That edge will be held down by the tongue-and-groove attachment to the first row.
You’ll only nail it through the tongue. As before, drive nails at an angle and countersink. The flooring nailer will speed things up once you have room. When space gets tight again near the opposite wall, go back to using the hammer.
9. Install the Trim and Moldings
Once you have all the planks nailed down, install the transition pieces to adjacent flooring types. Re-install the baseboard and shoe molding pieces and nail them to the wall. Fill any nail holes that show.
Nailing through the tongue so nails are covered up by the next plank is called blind nailing. Using the blind nailing method means all nail holes in the planks will be invisible except for the ones along the edges.
Video Tutorial
Flooring Installation Summary
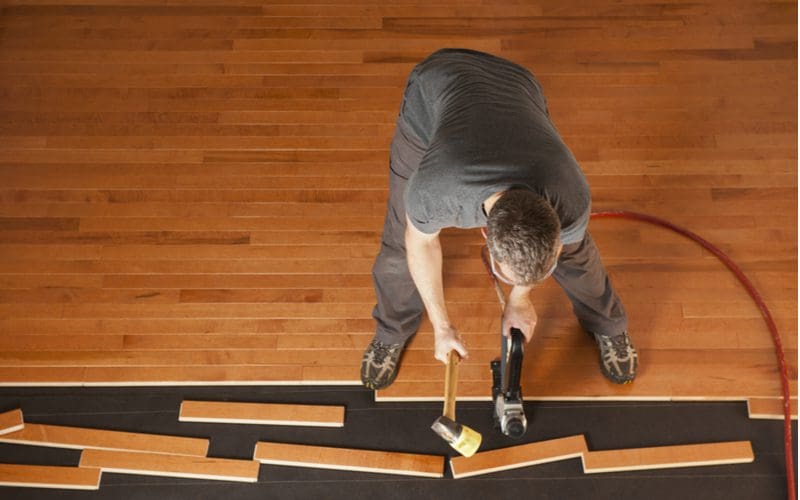

Michael Pettigrew/Shutterstock
Hardwood flooring is durable, attractive, and a great way to spruce up a room. You can likely install the flooring yourself.
Click-lock flooring is easiest to install, followed by glue-down flooring. Nailing down flooring is the most durable way to attach planks.
But it requires a wooden subfloor and some time, tools, and expertise. No matter what kind of hardwood flooring you select or how you install it, you can count on enjoying your floor for years to come.