

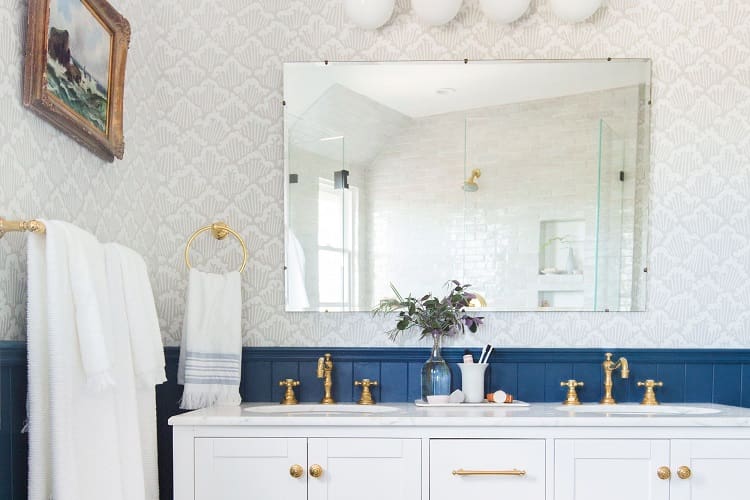
The bathroom is a separate, magical place where people want to relax.
But sometimes, when you walk into the bathroom, do you feel like something is missing? You may be missing the frame of the mirror.
The design of your mirror is fundamental! So why not create your perfect bathroom oasis with a stylish mirror?
Framing a bathroom mirror can be a daunting task. But with the proper methods and materials, you can give your room a new look.
In this blog, we’ll guide you through each step of how to frame a bathroom mirror with clips properly.
You’ll learn everything you need to know, from measuring and cutting to fitting in place. Following these simple instructions, you can create your own framed bathroom mirror in no time!
Tools and Equipment Needed

How to frame a bathroom mirror with clips?
It’s not as complicated as it looks. With a few simple tools and equipment, you can easily frame it in no time.
To get started, you will need the following:
- wood trim (you can use baseboard trim)
- mitre saw
- utility knife
- small chisel
- paint or stain
- liquid nails
- measuring tape
- painter’s tape
But that’s not all. It will help if you remember about safety: wear safety goggles, gloves, and face masks to protect your eyes and hands from dust or debris.
Also, you will be working with paint. Get yourself a mask or respirator to protect your respiratory system.
When you have all these tools and equipment ready, you are ready. Now let’s answer the question of how to frame a bathroom mirror with clips.
Step-By-Step Directions
So, it’s time to find out how to frame a bathroom mirror with clips. But before you start, there’s one important detail you need to make sure of.
You have to make sure that nothing gets in your way. Remove all items near the mirror, such as toothbrushes, cream jars, etc.
Remember also that work can cause a lot of rubbish. It means that before you start work, you must prepare a cleaning method.
For example, to clean less, cover everything with more foil.
Also, remember that good ventilation is essential when working with paint. If there are no windows in your bathroom, then open the door.
It is best to open a window in the room, and then there will be a slight drought. It will ventilate the room.
Step 1: Measure the External Dimensions of the Mirror
The first step is to measure the external dimensions of the mirror. Measure the width and height of the mirror.
Make sure you write down these measurements for future reference. You may even draw a diagram of the mirror for yourself; that way, you will be able to measure accurately.
Don’t know how to frame a bathroom mirror with clips?
Where to start?
It is crucial to be as accurate as possible with your measurements. If you make mistakes, your design may not be straight. But that’s only half the problem.
If you make significant measurement errors, you won’t be able to create your design. The edges will be too big, and the trim will not fit. So take your time and measure twice. Or three times!
Step 2: Cut the Wood Trim to Size
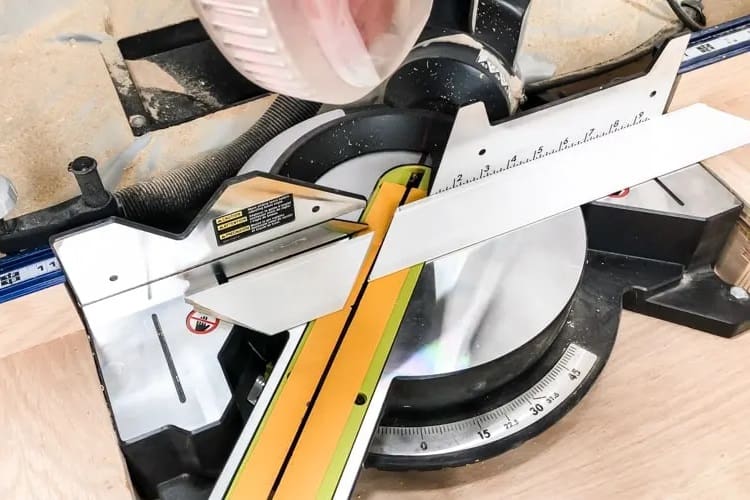

Once you have the measurements, cut the wooden trim pieces to size. You will need four pieces in total:
- Two for the sides
- Two for the upper and lower sides.
Make sure you make all cuts at a 45-degree angle. It is the only way to make perfect angles.
To cut perfect corners, you will need a mitre saw. This saw will make perfect corner cuts. That way, your paneling fits together perfectly. And you can do it without a lot of effort.
Or are you thinking of how to frame a bathroom mirror with clips without a 45-degree angle?
Then you can go a different way. There is an option where the corners of the frame are trimmed to 90 degrees. Then the top and bottom sides of the frame will be longer. And consequently, the two sides will be shorter.
Step 3: Priming
Now it’s time to prime the frame. Before doing so, use a small chisel to deburr any imperfections in the cladding.
Then, be sure to wipe down the timbers of the frame. This way, you will eliminate any sawing, and you can do the job perfectly.
You can choose a primer at any building shop. When you have done this, apply primer with a brush. If you need clarification, ask for help from a consultant.
After applying the primer, let it dry for a few minutes.
Step 4: Paint or Stain the Trim

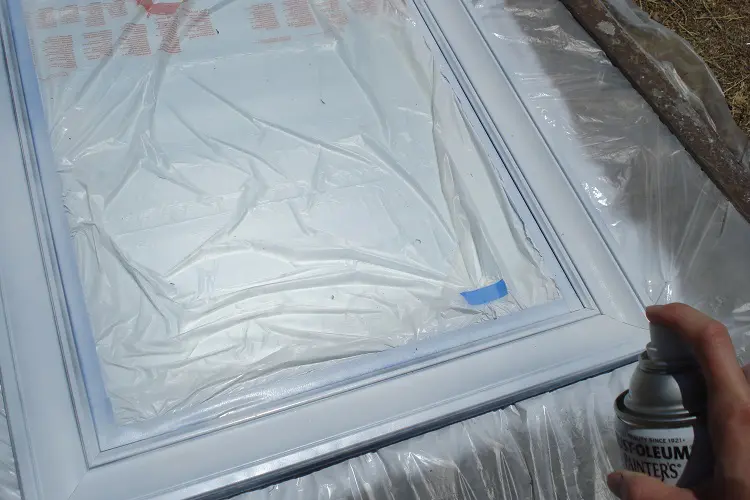
The next step is to paint or stain. Paint or stain will give the finish a beautiful finish. It will complement the overall look of the bathroom.
Select the frame’s color based on the bathroom’s overall design. Remember to wear a mask or respirator when working with paint or stains.
And also, open the window or the door to ventilate the bathroom. Then let’s frame a bathroom mirror with clips.
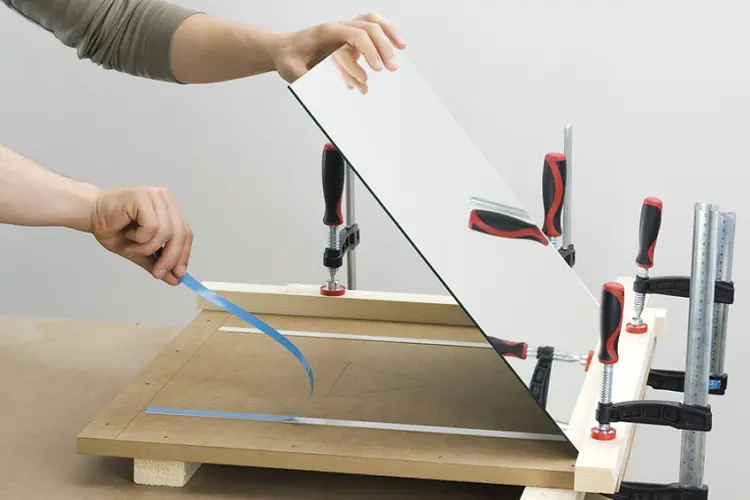
Step 5: Attach the Trim to the Mirror
Now that all the pieces are cut and painted, it’s time to attach them to the mirror. Attach the trim pieces to the mirror using liquid nails.
Make sure you use enough liquid nails. They must be secure and not come off easily. Use masking tape if necessary. With this, you can hold the trim while the adhesive cures.
Step 6: Install the Mirror Clips
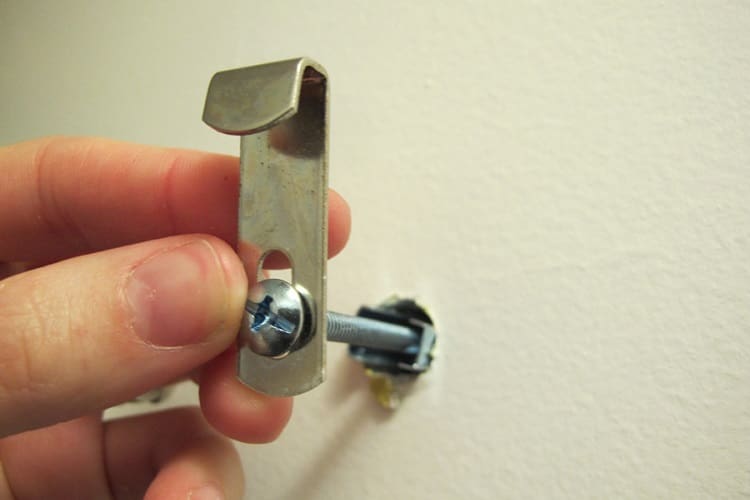
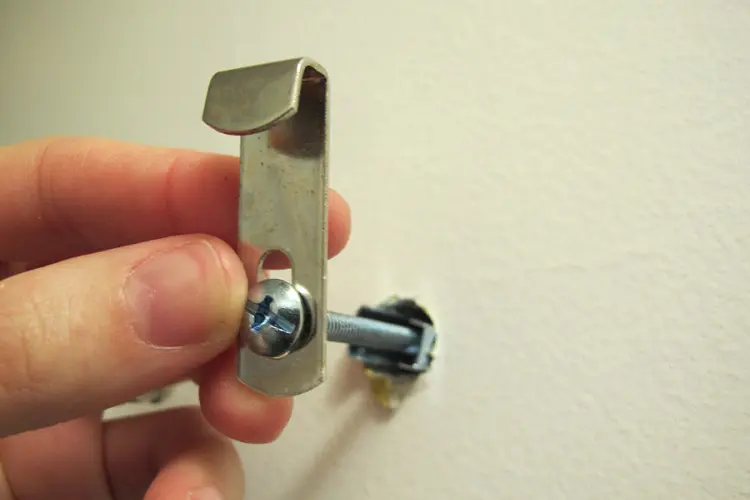
The final step is to install the mirror clips. To do this, measure the distance between them and mark these locations with a pencil on both sides of the frame. Then drill holes for each clamp and secure them with screws.
That’s it! Now you know how to frame a bathroom mirror with clips. Finish by cleaning up any excess liquid nails and paint. And enjoy the results of your hard work!
Safety Tips
Before starting any project, it is vital to take safety precautions. It includes how to frame a bathroom mirror with clips.
Wear safety goggles and gloves when working with tools. These will protect your eyes and hands from injury when sawing or drilling material.
Also, make sure you are wearing the proper clothing for the job. We recommend wearing long trousers and closed-toe shoes to protect your legs and feet better.
Finally, remember to work in a well-ventilated room before working with paint or stain.
If you’re doing everything in the bathroom, wear a protective mask or respirator. Also, be sure to open the door so the smell of paint and stains doesn’t linger.
And stay away from children and pets! They certainly won’t be the best helpers regarding how to frame a bathroom mirror with clips.
FAQ
Conclusion
By following these steps carefully, you can quickly learn how to frame a bathroom mirror with clips. Have fun, and enjoy the results!
Note: Be sure to familiarize yourself with the safety instructions for each product you use and local building regulations.
And always wear protective equipment when necessary.