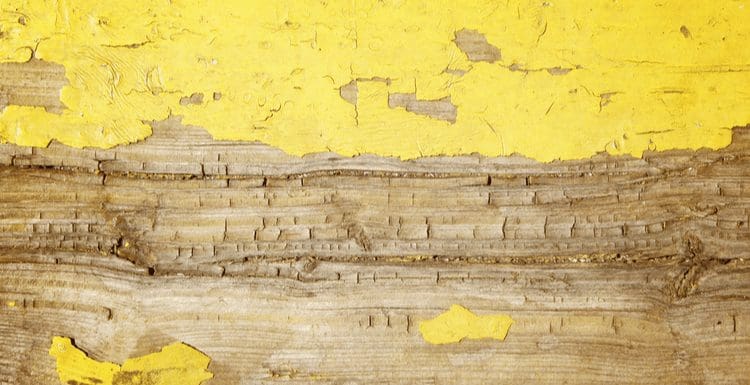
Painting over stained wood isn’t as straightforward as painting on bare wood. But it can be done, even without professional painting skills.
How to paint over stained wood? The first step is preparing the wood by cleaning it and scuffing it with sandpaper.
Then, you have to add a primer layer and repair any chips in the wood before painting it.
What You’ll Need
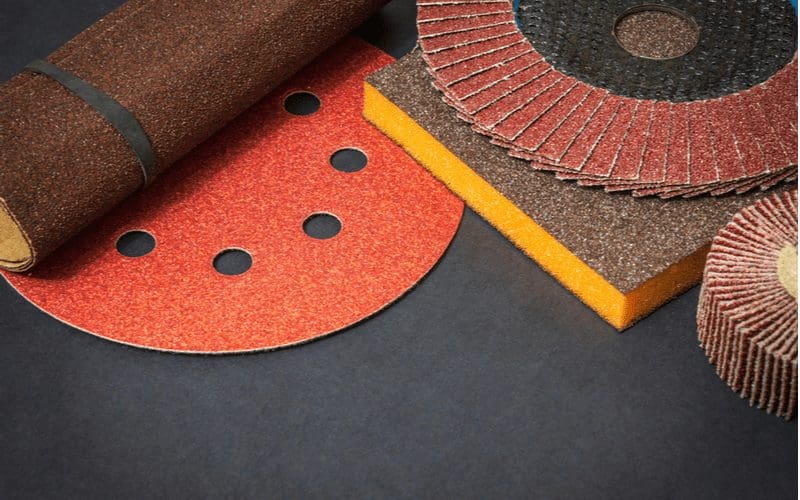

Vitalii Borkovskyi/Shutterstock
Before you start painting over stained wood, you need certain equipment. Your work area should include the following:
- 150 Grit Sandpaper: Sandpaper is a crucial part of painting over stained wood. With it, you’ll be able to prep the wood for the painting process.
- Tarps: While they’re not exactly crucial to the painting process, tarps will help you ensure the work area stays clean.
- Primer: A high-quality primer is a must-have for painting over stained wood. It’s important because it prevents the paint from seeping into the wood. With a primer, you can cover blemishes present on the stained wood. Hence, you’ll need fewer coats to paint the wood piece.
- Tack Cloth: It’s a piece of clothing for cleaning up excess paint and dust present on the wood.
- Paintbrushes: These are a no-brainer for painting over stained wood. You’ll need different sets for applying primer and paint coats. If possible, you should also have foam rollers.
- Protective Finish: The right finish determines how long the paint job will last. It can make all the difference to how the stained wood looks after you paint it. Go for a protective finish that’ll dry fast and remain durable for a long time.
- Gloves: These will protect your skin from contacting harmful chemicals.
- Safety Masks: Masks are critical to your safety on any project where you’re sanding, painting, or using chemicals.
Now that you have all the equipment in place, follow the step-by-step instructions below to paint over stained wood.
How to Paint Over Stained Wood in 5 Steps
Let’s get started.
Step 1: Start by Preparing the Wood
Painting over stained wood always begins with preparing the wood piece. Start by removing any fittings present on the stained wood piece.
For instance, to paint a cabinet with hinges and handles, you’ll need to remove these fittings. As long as the fitting is made of non-wood material, you should remove it. Otherwise, you risk covering the items in paint, and you’ll have to clean them afterward.
The next step to preparing the stained wood is washing it. A block of regular dish soap works great. Make sure to remove specks of dirt and grease on the surface of the stained wood.
Many people ask if you can paint over stained wood without sanding. Some DIY experts say it’s possible, but we suggest sanding the wood for the best results.
When sanding, be sure to use 150-grit sandpaper. If you have finer sandpaper, that’ll work too. The goal of sanding stained wood is to roughen the surface.
It’s easier for the paint to latch onto a rough surface. While sanding the stained wood, take care not to strip the surface away. Lightly move the sandpaper in the same direction as the grain.
The final piece of the preparation puzzle is a deglosser. The unofficial term for a deglosser is “liquid sandpaper.” It contains solvents that’ll strip the finish away from the wood surface.
Deglosser contains chemicals that can be harmful to the skin and lungs. You should only use it while wearing gloves, a safety mask, and working in a ventilated space.
Simply dip a rag into the deglosser solution and wipe down the surface of the stained wood. Give it 10–15 minutes to dry before proceeding to the next step.
Special Prep for Oil-Based Wood Stains
Oil-based wood stains will require an extra preparation step before painting begins. So you should find out whether the wood stain is water- or oil-based.
Sprinkle a bit of water on the surface of the wood and wait for a few minutes. If the water droplets bead up, you’re dealing with oil-based stains.
To prep oil-based stained wood, here’s what you need to do:
- Dissolve a small portion of a cleaning agent like Trisodium Phosphate in a gallon of lukewarm water.
- While wearing gloves, dip a sponge into the mixture, wring it out, and wipe down the wood.
- Allow the sponge to soak up any particles present on the wood.
- Repeat the steps above and wait for the surface to dry.
- Wipe the stained wood piece clean using a slightly damp rag.
Step 2: Add a Primer Coat
A primer coat is vital if you’re painting over bare wood. With stained wood, it’s even more important. A primer coat improves the adhesion quality of the paint. It also seals the stain, preventing the paint from bleeding through it.
A common issue with stained wood is bleeding through, which can lead to patchy, discolored areas after painting. You can use a water-based or stain-blocking primer.
But if you’re working outside or still discover bleed-through, you should buy a shellac-based primer. Using a paint brush or a roller, apply a coat of primer to the entirety of the stained wood piece.
Make sure to apply the primer to every part of the stained wood. After the primer application, wait until the stained wood dries completely. Then, using a tack cloth, wipe away all wet spots.
Step 3: Scuff and Make Repairs after Primer Application
A critical step in painting stained wood is to fill the cracks. There may also be chipped edges that require repair. After applying a fresh coat of paint, you’ll really notice blemishes, even small ones. So be sure to take your time on this step.
The ideal time for these repairs is after the primer dries completely. Primer improves the adhesion quality of wood repair materials like plastic wood.
It also intensifies caulk adhesion. Therefore, if you’re looking to paint over stained interior trims or stained headboards, do the recaulking after the primer dries.
Finally, you should roughen the primer layer (by scuffing) after making the necessary repairs and doing any recaulking. The goal isn’t to wear out the primer layer.
Instead, you want to flatten any visible brush lines. Like in step 1 above, you should use 150-grit sandpaper, though finer sandpaper works best for finishing. Remember to remove any sand dust before proceeding to the next step.
Step 4: Paint the Stained Wood
Using a new brush or foam roller, apply at least three coats of paint to the stained wood. Although you’re applying multiple coats of paint to the stained wood, it shouldn’t happen simultaneously.
You should allow for five to six hours of drying between the application of paint coats. We suggest allowing more time to dry to be safe. While waiting, check and remove paint clumps or residue using a tack cloth.
You can use latex or oil-based paint, depending on the purpose of the wood piece. Latex paint is best for doors and cabinets because it doesn’t have an odor. Conversely, thanks to its durability, oil-based paint works for high-traffic areas like porches and decks.
Step 5: Apply a Layer of Finish
A finish layer is important to protect the stained wood piece. A polycrylic protective finish will protect the integrity of the paint job for a long time. Depending on the product, you can apply the finish with an aerosol or a cloth.
Topcoat is another form of protective finish that protects against moisture, scratches, and the sun. If you have pets or kids, then you should spring for a topcoat layer.
Add the topcoat to the painted wood surface using a fresh brush or foam roller. Try to make the application as even as you can. Then, wait for the topcoat to dry. Under normal circumstances, it can take 24 hours for a topcoat layer to dry.
If you notice an untouched spot after the protective finish dries, you can add a second layer. Just make sure to touch every part of the wood piece this time around.
Things to Consider When Painting Over Stained Wood
Painting over stained wood is a task that requires time and delicate precision. To ensure the best results, follow these tips:
- If you’re working indoors, use a fan to boost airflow in the work area
- Plan before you start working on the stained wood piece, and prepare all the equipment you need
- Disposable rollers are a good idea because they equal less cleaning up afterward
- Wear work clothes so you can paint over stained wood without worrying about getting dirty
So, How Do You Paint Over Stained Wood?

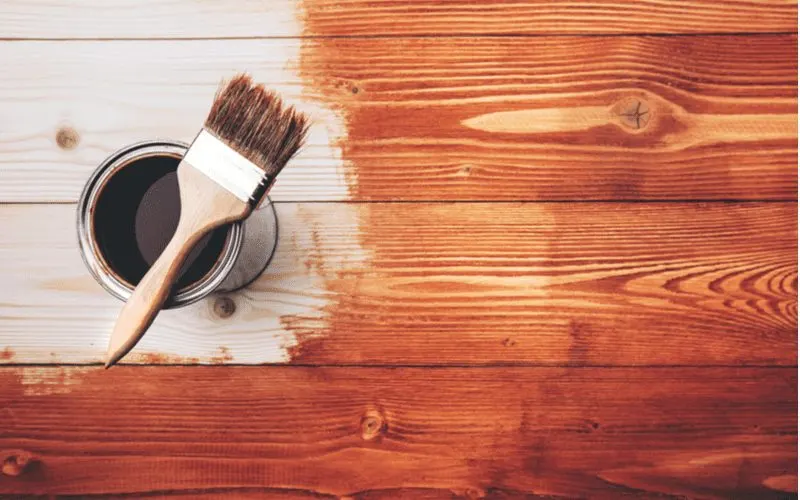
Efetova Anna/Shutterstock
Painting over stained wood is a project that can take the whole day. But, when you do it well, the results are well worth it.
It all starts with a comprehensive preparation step which we have discussed above.
After prepping and priming the stained wood piece, you can go ahead and paint it the way you want.
You can even make it a fun DIY day with friends and loved ones. Good luck!