
Having a basement often means fighting a constant battle against water.
A sump pump is a key part of the homeowner’s arsenal in this struggle. Luckily, installing a sump pump is within the skill set of many do-it-yourselfers.
The job involves removing the old pump or digging a hole for a retrofit, installing a pipe to remove water lifted out by the pump, placing a liner and the pump in the hole, connecting the pump to the drain line and electrical power, and testing the unit.
The good news is that you can do it yourself. So, how to install a sump pump? Easy! Just follow the step-by-step directions below.


We partnered with Networx to help you find local plumbers in your area. Click to below to get a FREE quote.
What Is a Sump Pump?

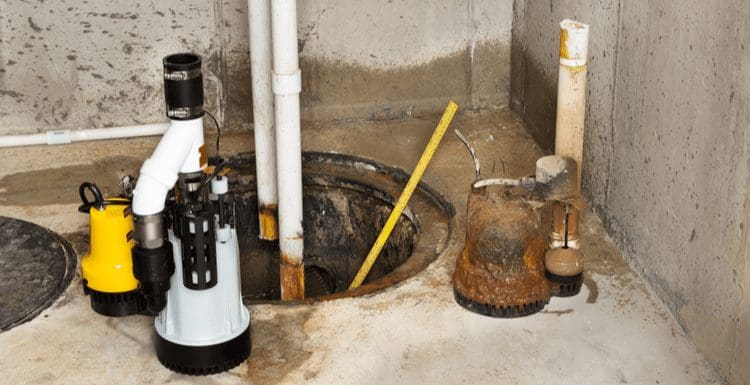
An electrically powered sump pump is central to the system that collects water and removes it from the basement.
Drainage channels dug along the inside of the basement walls collect the water. Pipes take it from the channels to the sump pump, located in a hole or pit situated below the basement floor.
A detector in the sump pump turns it on automatically when enough water builds up. The sump pump then forces the water up and out through a discharge line, where it connects to a sump well or city drainage system to dispose of the excess water.
You can buy a sump pump at many online suppliers or any home improvement store. Pumps cost from around $50 to as much as $500.
Pump motors range from an output of around 1/4 horsepower to 3/4 horsepower.
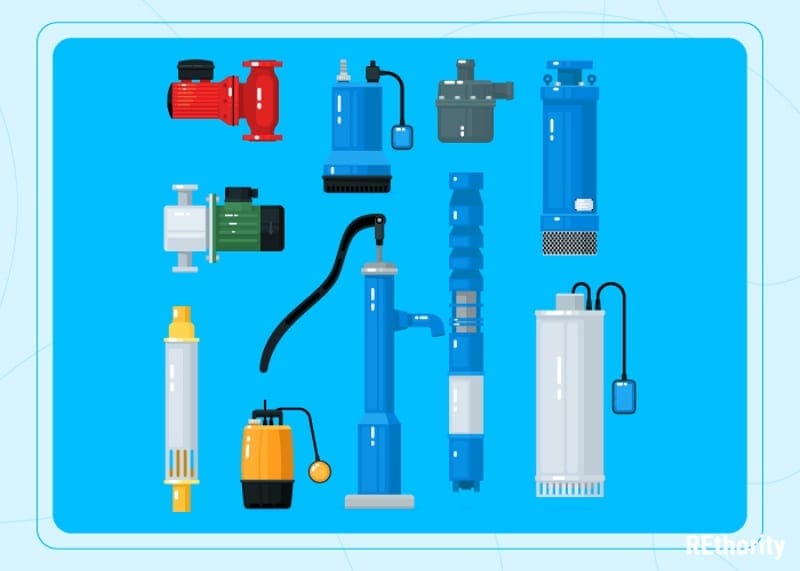
Types of Pumps

Low-capacity pumps can move around 1,000 gallons per hour. High-capacity pumps can pump as much as several thousand gallons of water out of a basement per hour.
Some pumps may be able to cope with solids up to 2 inches in diameter without clogging. Pumps may be made of plastic, stainless steel, cast iron, or other materials.
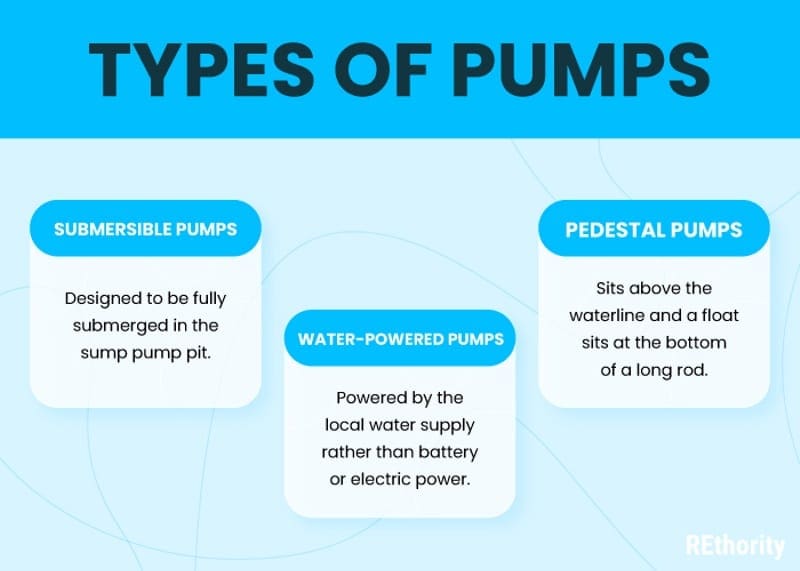
Some sump pumps are submersible, meaning they can work when completely covered in water. Pedestal-style pumps rest on a platform that keeps the motor above the water level.
These are useful when limited space requires a small sump pit. The submersible models are generally more powerful and capable of handling debris that gets into the sump pit.
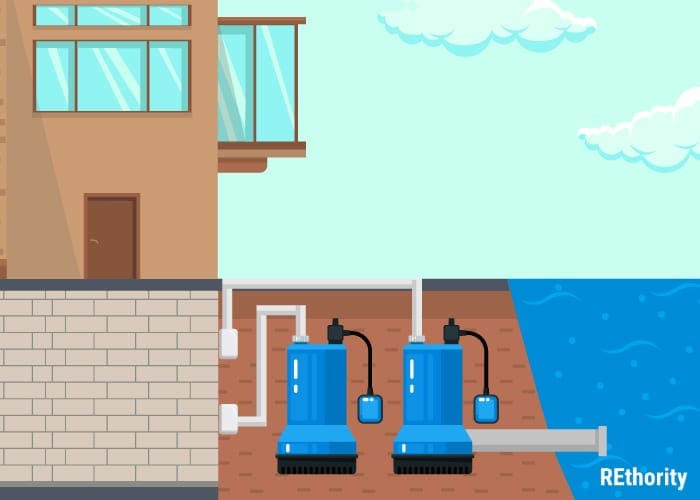
Power is necessary when a pump has to lift water several feet to carry it outside the foundation for disposal. Primary pumps are powered by household alternating current.
Some have battery-powered backup pumps. These enable the pump to keep working even if the household power goes out. More advanced pumps connect to wi-fi networks.
This lets them be controlled remotely and monitored to ensure they are working properly. Many but not all pumps have automatic switches that use a float to detect when the water level is getting high.
These pumps can remove the water from a basement before it becomes flooded without any action needed by the homeowner.
How to Install a Sump Pump
Installing a complete basement drainage system in new construction or in an existing basement may require various specialized tools, such as jackhammers and trenching equipment.
Sump Pump Installation: Required Tools
For most sump pump replacement installations in an existing basement, you will need the following:
- Sump pump
- Check valve
- 10 feet or so of 1 1/2-inch PVC pipe
- PVC cleaner and cement
- Coupler, usually made of rubber
- Power drill
- Hacksaw
- Pipe wrench
- Pliers
- Gloves
- Rags
- Bucket
You may also use a wet-dry vacuum to remove any water that has collected. Zip ties are handy for fastening wires.
Sump Pump Installation Steps
Before doing anything, read the installation manual for your sump pump.
These steps will work for most pumps, but some may have specific requirements.
- If you are installing a pump in a basement for the first time, dig a pit at least 14 inches wide and 22 inches deep below the floor level. Ensure that the bottom is level. Place tiles or concrete blocks at the bottom of the pit to provide a flat, level surface for the pump to rest on.
- For a replacement, remove your old pump. Disconnect the electrical power. Disconnect the check valve and use the towels or wet-dry vacuum to remove any water that drains out. Take the old pump out of the pit and put it in a bucket to contain any additional drainage. Inspect the sump pit to make sure the bottom is level.
- Start your new pump installation by attaching the check valve to the PCV discharge pipe. Clean with the PVC cleaner before applying glue. Slide the valve coupling over the pipe fitting, then put glue inside the fitting and place it on the discharge pipe.
- Attach the PVC pipe to the adapter and pump. The adapter will have male threads. Use PCV cleaner and glue to attach it to one end of the pipe. Then thread the adapter onto the pump. Tighten with a wrench, taking care not to over-tighten the plastic fitting.
- Drill a weep hole a couple of inches above the adapter. Use a 3/16” bit, angling down so that water can drain out.
- Trim your PVC pipe so that it is a few inches longer than the distance from the ground to the center of the threaded fitting for the pump discharge pipe. Double-check your measurements before cutting.
- Check again to make sure the discharge pipe and check valve fit correctly. Put the pump into the pit and connect the discharge pipe to the check valve. Clean and glue the coupler to the pipe. Tighten the threaded adapter by hand to avoid over-tightening.
- Plug the pump into an outlet. This may need to be a GFCI outlet, depending on local codes. Check to see that the float that triggers the sump pump is not blocked or obstructed and moves freely.
- Before testing the pump, pour enough water into the pit to fill it. Turn the pump on and make sure water is going out through the check valve. Then turn the pump off and make sure the check valve closes to keep water from flowing back into the basement.
- After installing the pump and testing it, use zip ties to fasten the wires connecting the pump and float switch.
A full installation of a new basement water collection and sump pump system also involves digging a drainage channel around the perimeter of the basement.
This requires using a jackhammer to break through the concrete floor for a retrofit into an existing basement. Gravel poured into the drainage channel makes a bed for the drainage pipe to collect and direct water to the sump pit and pump.
The drainage channel and drainage pipe have to be sloped down, or water will collect without reaching the pump. The sump pit should be located in the lowest part of the basement floor.
Inside the sump pit, a plastic liner captures the water from the drainage channel until it builds up to the level required to trigger the sump pump.
Gravel may be placed around the inside of the sump pit to keep the liner stable. A bead of caulk can also be run around the rim of the liner.
We partnered with Networx to help you find local plumbers in your area. Click to below to get a FREE quote.
Sump Pump Installation Summary

Installing a new sump pump is not something that has to be done often.
A professional can do the job quickly and correctly, but a homeowner may have to wait days or weeks to get a professional installer to come out to do the work.
Doing it yourself can give you peace of mind today, knowing you have a powerful ally in the battle against basement flooding.