
Wondering how to install carpet?
If so, you’re in the right place. In this guide, we’ll cover the materials you need and the steps to follow to replace your old and worn-out carpeting. Read on to learn more!
Summary of Steps
Installing a carpet yourself can save you a lot of money, but it may seem daunting at first.
By getting the correct tools and planning carefully, you can upgrade your flooring without hiring a professional. In a nutshell, these steps include:
- Clear your floor
- Measure the room
- Determine the carpet size
- Gather the materials
- Install tack strips
- Lay the padding
- Acclimatize, measure, and cut the carpet
- Roll out the carpet and fasten the seams
- Anchor the carpet
- Trim the edges
- Install transition strips
How to Install Carpet in 11 Steps


Andrey_Popov/Shutterstock
Step 1: Clear Your Floor
Begin by clearing the floor. If you have carpet installed already, make sure you remove it.
Then, vacuum and mop the subfloor to remove any debris. If there are cracks on the floor, use a sealant to create an even surface.
Any lumps may result in protrusions in your carpeting. While you wait for the subfloor to dry, remove the entrance and closet doors.
You may need to take out the baseboards as well if you’re transitioning from a hard floor to a carpeted one. Replacing old carpet shouldn’t require you to pull out the baseboards.
If you do remove them, install the new ones about one inch over the subfloor to leave space for the carpet and padding. This value may change, depending on the thickness of your materials.
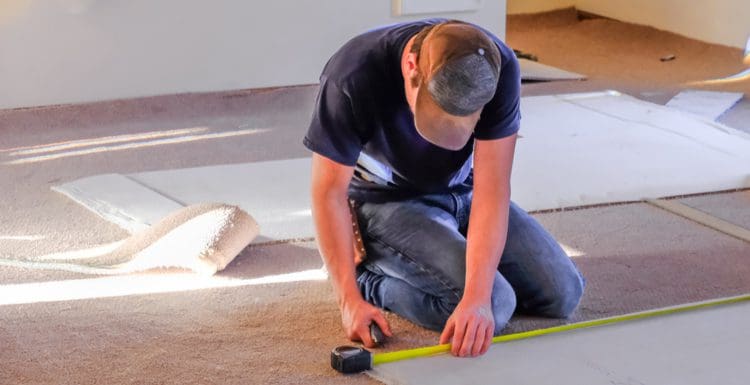
Step 2: Measure the Room
Measure your room’s length and width. Write down the size of every wall. If you have a square or rectangle room, multiply the length and width to determine the square footage.
For odd shapes, divide the room into multiple shapes and find the area of each. Add them together to get the total square footage. You may need to pull out a geometry textbook for this one!
Step 3: Determine the Carpet Size
Once you have the area, add about 10% to 20% to the estimate. You’ll want some extra material in case you make a mistake or need to cut smaller strips for nooks and crannies.
To determine the amount of tack strip needed, you can measure what you removed from the old carpet.
If you don’t have a reference, measure the perimeter of the room and add 10%. Choose the widest option available.
Step 4: Gather the Materials
You’ll need a number of materials, including:
- Carpet
- Carpet padding
- Tack strips
- Edging
- Epoxy adhesive
- Handsaw
- Hammer
- Utility knife
- Masking tape
- Duct tape
- Hammer-tacker or staple gun
- Chalk line
- Stable cutting surface
- Carpet cutter
- Box knife
- Straight edge
- Heated seaming iron
- Heat-activated seam tape
- Knee kicker
- Wall carpet trimmer
- Carpet stretcher
- Transition strips
- Drill
- Aluminum nails
- Carpet roller
- Chisel
Step 5: Install Tack Strips
Use a handsaw to cut the tack strips to the wall’s length. Lay the tack strips about two-thirds of the carpet’s thickness away from the wall. Keep them aligned with the tacks pointing towards the wall.
Take two nails for each strip and hammer them into the subfloor. Many tack strips have the nails attached, but you may need to purchase them separately.
If you have a concrete floor, you may need to drill holes using a bit the size of the hole. Then, hammer in aluminum nails.
If you don’t want to drill nails into the floor, you can use epoxy adhesive to attach the strips. Floor vents require separate tack strips as well.
Step 6: Lay the Carpet Pad
Roll the carpet pad across the length of the room. When you get to the opposite wall, slice off the excess with a box knife. It should lie within the tack strips’ border.
Continue rolling out padding until you cover the entire room. Align the seams to avoid protrusions on the ground.
Use a staple gun or hammer-tacker to secure the padding. Place a staple every two feet along the pad. Ensure that you insert the staples on the inside edge of the tack strips.
On concrete floors, use carpet adhesive or padding glue. Lift up the pad strips one by one and place the glue underneath. For the seams, you can choose to staple or tape them together.
Step 7: Acclimatize, Measure, and Cut the Carpet
To acclimatize the carpet, keep it in your house for 24 hours. It may change its size depending on the humidity and temperature.
Leave it rolled up as this occurs. Determining the carpet size requires you to measure the longest wall.
Add six inches to this value. Then, unroll enough carpet to match the length. You may need to measure and cut the carpet outside of your room, depending on its size.
Notch the carpet at the spot you want to cut it with a utility knife. Then, attach a chalk line at the notch height.
If you don’t have a chalk line, you can use a straightedge to mark where you need to cut it. Prop the carpet on a stable surface and use a carpet cutter to slice along the line.
You might be able to get away with a box knife if you don’t have a carpet cutter. Repeat until you have enough carpet strips to cover the width of your room.
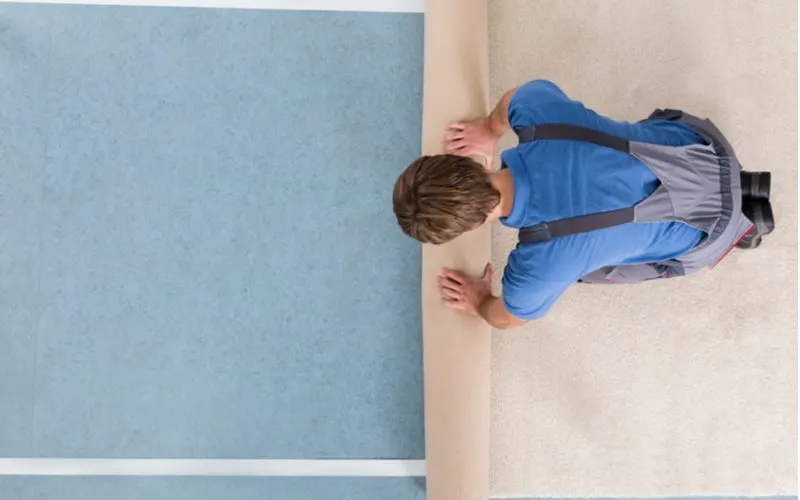
Step 8: Roll Out the Carpet and Fasten the Seams
Unroll the carpet, starting at one corner. Leave about three inches of carpet on the side against the wall, making relief cuts at the corners to help it lie flat. Keep rolling out carpet strips until you’ve covered the floor.
Line their sides together to make seams. For oddly-shaped corners, perform some extra trimming after rolling it out. Trim it to the size and shape of the area, leaving three inches on the side.
To fasten the seams, use heat-activated seaming tape. Lay it on the floor with the adhesive side facing upwards.
Put the carpet seam over the tape and use a heated seaming iron on setting two or three to secure it. Lift the carpet on either side to slip the seaming iron under it and on the tape.
Hold it for about ten seconds to let the adhesive melt before moving the iron to the next spot. Press the heated seam to secure the carpet. While the glue dries, place a heavy, flat object on the seam.
Try to keep them in low-foot-traffic areas to help the seams last longer. A carpet roller can help seal the seam.
You run it over the surface several times as you heat each section. You’ll need to wait 20 minutes before stretching and tacking the carpet.
Step 9: Anchor the Carpet
Place a knee kicker’s toothed edge three inches from the longest wall. The knee kicker will help you hook the carpet in the right spot on the tack strip. Use your knee to hit the flat edge sticking out.
Keep moving against the wall and striking the knee kicker to remove any slack or wrinkles from the carpet. You can take a carpet stretcher or use your force to pull the carpet tight across the room.
Use the knee kicker to attach it to the opposite wall, ensuring you remove any lumps. Continue to the other walls, securing the rest of the carpet with the knee kicker.
Step 10: Trim the Edges
Use a wall carpet trimmer to remove the excess carpeting. Set it to the carpet’s thickness and hold its shoe against the flooring.
Hold the carpet to the baseboard and drag the trimmer along the wall. You can use a box knife instead of the wall carpet trimmer as well.
Make sure it has a sharp blade. Also, use this tool to cut holes for the floor vents.
Before removing the trimmed strips, ensure you have cut all the way through. Yank them off and use a chisel to press the carpet edges into the baseboard.
Step 11: Install Transition Strips
If the next room has hard flooring, you’ll want to use transition strips. Seal the carpet’s edge using a latex seam sealer.
Then, install the transition step using a brad nailer. Now, you can put back the doors, stoppers, floor vents, and furniture.
Things to Consider

Andrey_Popov/Shutterstock
Here are a few things to keep in mind when learning how to install carpet:
- While carpet-specific tools will do the best job, you may be able to get away with brute force, a hammer, and a box cutter for many of these steps
- Always consult the manufacturer’s manual before trying out the products
- You may not want carpet if you have respiratory issues, as it can trap pollutants
So, How Do You Install Carpets?
If you want to install carpet, you’ll need some specialized tools, plenty of time, and basic craftsmanship skills.
All you need to do is clean the floor, choose the right-sized materials, and put them in place. Now that you know how to install carpet, you just need to give it a shot!