
It’s not a skill that’s used every day, but knowing how to install a sink drain can save you big money when you do need it.
The process is relatively easy, and we cover everything you need to know below.


We partnered with Networx to help you find local plumbers in your area. Click to below to get a FREE quote.
How to Install a Sink Drain
Most people have never changed out a sink drain, and there’s no shame in asking for help. The good news is that the entire process is fairly simple, even for the average homeowner.
You can get everything done in about an hour, as long as you have the right tools and know exactly what you are doing.
Before we get into the step-by-step instructions, let’s take a quick look at the anatomy of a drain.
If you want to learn how to install a sink drain correctly, it is best to start by knowing the various components you’ll be working with.
While sink drain systems can vary depending on where they are supposed to go (kitchen, bathroom, etc.), a typical system will have the following major parts:
- A sink basket strainer is the screen or net that prevents dirt and debris from getting into the main sink drain pipe.
- Tailpiece: The plastic pipe that attaches to the sink strainer and comes out of the sink bowl at the bottom.
- P-trap: the curved part that connects to the tailpiece. It collects debris or sediments that manage to pass through the basket strainer and also prevents stinking sewer gas from entering your home.
- A drain pipe is the pipe that attaches to the P-trap and connects to the wall.
Before You Start
It’s a good practice to first dry-fit the parts to make sure they work well before applying putty and tightening them.
This will save you a lot of frustration and trips to the store during installation. Also, make sure to clean any surface you plan to apply a plumber’s putty to for the best results.
That means removing any remnants of old putty from the basin’s flange and generally cleaning the various components of the drain kit.
Last, you’ll want to rough-fit everything to make sure you get a fair idea of what parts you need to cut short or make longer. Use a hacksaw or PVC tubing cutter to cut the pipes into the right sizes.
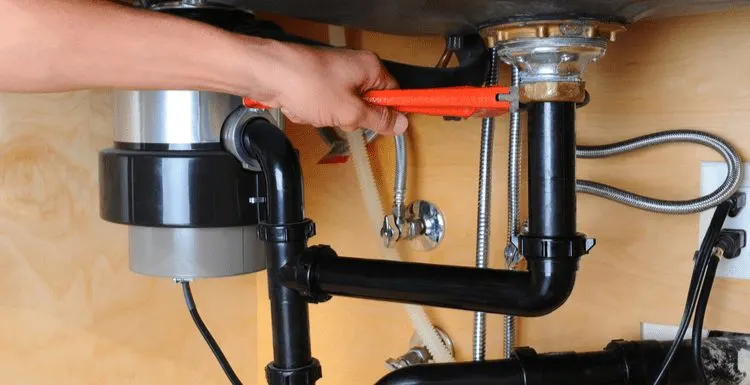
How to Install a Sink Drain


Pixel-Shot/Shutterstock
Sinks come in different shapes and sizes, but to keep things simple, we’ll focus on installing a sink drain in your kitchen. You can apply these steps to a bathroom sink or even a dishwasher drain.
While you may need to tweak things a bit because of the slight differences in the various parts, the basics are pretty much the same.
Now, let’s get into how to install a sink drain in two steps. First, we’ll show you how to install the sink basket and then move on to the drain pipes.
1. How to Install the Sink Basket
What you’ll need:
- Sink basket strainer kit (it should come with a friction ring, rubber washer, and nut)
- Kitchen sink drain wrench
- Needle-nose pliers
- Plumber’s putty
Step-by-Step:
- Scoop out a sizable amount of plumber’s putty and roll it between your palms to make a rope. This is similar to what kids do with playdough when they make snakes.
- Wrap the putty around the circumference of the sink basket. Apply pressure to make sure the plumber’s putty stays snug in the sink basket.
- Place the sink basket wrapped in putty into the hole at the bottom of the sink basin.
- Press down the sink basket into the basin bottom until the putty oozes out from the sides.
- It is time to attach the bottom piece, which is one of the other components that come with the strainer kit. Go under the sink basin and place the rubber washer on the part that projects from the sink hole at the bottom.
- Next, place the friction ring right after the rubber gasket or washer. Now thread the nut to make sure everything is tightly in place. More putty will gush out a bit further, and that’s okay. You can clean this off afterward.
Note: Remember to put the friction washer in place before tightening the nut on the sink drain strainer. If you forget this bit, the nut will warp the rubber washer as you tighten it.
- Tighten the nut some more using the kitchen sink drain wrench. Use the needle-nose pliers to hold the sink basket in place. This prevents the sink basket from rotating in its hole as you tighten the nut.
- Wipe off the excess plumber’s putty with your fingers to make the groove look nice. You can put the excess putty back in the container for later use. Make sure the container remains tightly shut to prevent drying.
Note: If you’re doing a kitchen renovation, now is a good time to install a garbage disposal, water dispenser, water filter, and any other under-sink components. These take up the most space, so it’s best to get them in before installing the sink drain.
2. How to Install the Drain Pipes
What you’ll need:
- Tailpiece
- P-trap
- High-hat washer or gasket
- Fitting trap adapter
- Several slip nuts and rubber washers
- Straight PVC pipe (use a hacksaw or PVC tubing cutter to cut the pipe into the right size)
Step-by-Step:
- Remove the gasket or high-hat washer that comes with the flanged-bottom slip nut. Place it on top of the tailpiece pipe.
- Position the tailpiece pipe with the washer under the basket strainer, protruding from the basin’s bottom.
- Slide the slip nut from the bottom of the pipe and thread it onto the basket strainer. Make sure it fits snugly.
Note: If you have a tailpiece pipe with a dishwasher drain branch, it should come with a plastic nut already integrated over the branch, so you won’t need a slip nut.
- Next, slide the fitting trap adapter onto the tailpiece pipe and tighten it.
- Insert the straight PVC pipe into the drain that comes out of the wall. Use one slip nut to tighten the pipe snugly in place.
- Now place your P-trap between the straight piece that goes into the drain and the tailpiece coming from the sink bottom. Fit one rubber washer at both ends of the P-trap and tighten with slip nuts.
- Hand-tighten all the connections at the drain, P-trap, and tailpiece pipe. Use a pipe wrench to tighten them further.
Checking for Leaks
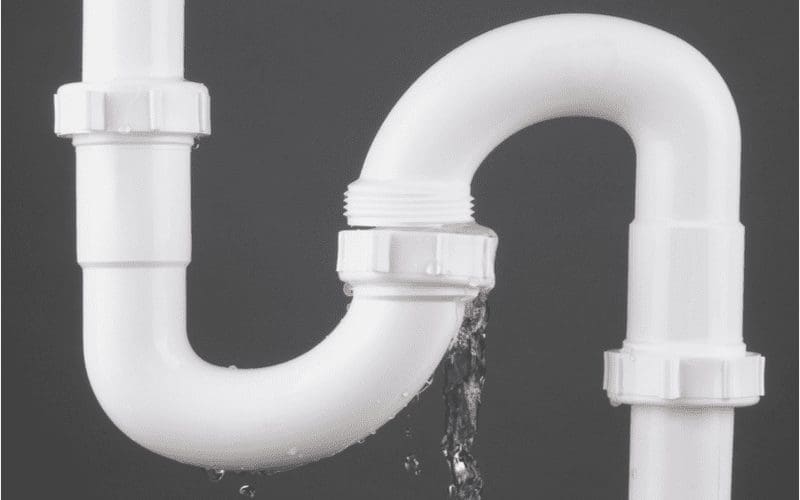
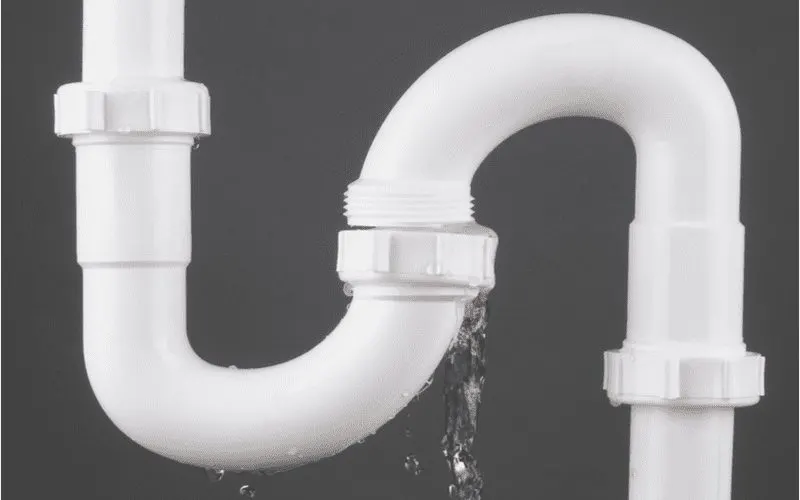
Steve Cukrov/Shutterstock
A sink drain has multiple pieces, which we consider to be potential points of failure. We highly suggest placing a paper towel under the sink.
This way, if there are any leaks, you’ll be able to clearly identify them while also catching some of the water. To check for leaks:
- Run water in the sink basin and look out for leaks at each pipe joint. If you have done everything correctly, there shouldn’t be any major leaks. If there is a leak, you’ll usually see it in one or two slip nut joints.
- Retighten any connection where you find leaks (being careful not to over-tighten).
- Now fill up the sink basin with water for the final test.
- Let it drain while you watch out for any leaks at the bottom.
- If you still get leaks after retightening the connections, you need to remove the nuts and readjust the washers. Tighten the nuts again, making sure the friction ring and washers are in place. Be sure the nuts aren’t cross-threaded when you thread them.
Frequently Asked Questions
We partnered with Networx to help you find local plumbers in your area. Click to below to get a FREE quote.
So, How Do You Install a Sink Drain?
Following the steps above, installing a sink drain is pretty straightforward. You don’t necessarily have to be a professional plumber to install a sink drain in your kitchen or bathroom.
But basic DIY plumbing skills are required. We suggest leaving this to the pros — just click the green button above to be paired with a local plumber for a completely free quote.