It may sound crazy, but horseshoe pit dimensions matter.
In fact, there are many people who play the game semi-professionally, so it’s important to build your own pit correctly.
Read on to learn more.

Are There Official Horseshoe Pit Dimensions?
About 15 million people in North America pitch horseshoes, according to the National Horseshoe Pitchers Association. You can build your own backyard horseshoe pitching court with a few readily available materials and tools.
Horseshoe pitching reportedly dates back to the days of the Roman Empire. Roman soldiers used shoes discarded from the horses that pulled their chariots.
In the intervening millennia, horseshoe pitching has become organized. Today, there are standard dimensions for an official horseshoe court.
The NHPA regulations for court specifications, in fact, run to numerous pages. They cover everything from lighting to safety to temporary court installations and multi-court complexes.
Basic Horseshoe Pit Dimensions

However, the basic requirements are relatively uncomplicated. The simplest court should consist of:
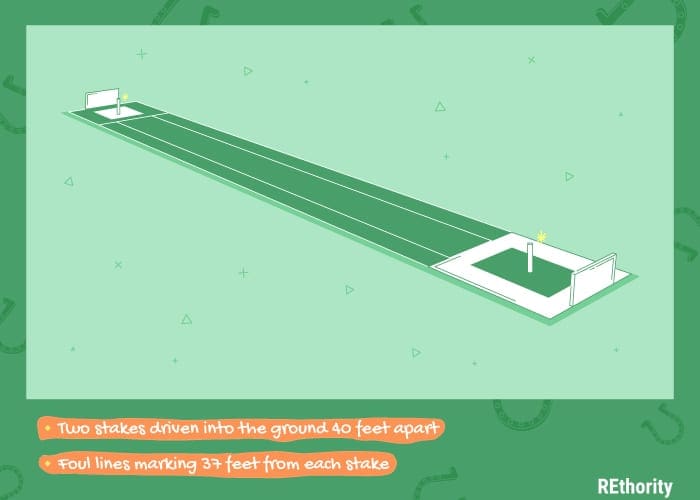
- Two stakes driven into the ground 40 feet apart
- Foul lines marking 37 feet from each stake
From there, several elaborations are possible. For instance, you could mark a second set of foul lines just 27 feet from the stakes.
These shorter courts are to accommodate pitchers under 18 years old, women, and men over 70. A basic improvement is to create a horseshoe pit instead of merely pounding in the stakes.
At a minimum, you can loosen the dirt around the stakes to a depth of 2 to 4 inches. This will help keep stakes from bouncing when they hit the ground.
DIY Horseshoe Court Requirements

Want to go further and create a do-it-yourself backyard horseshoe pit that will be the envy of the neighborhood?
Here are step-by-step instructions for how to build a horseshoe pit.
Start by picking a spot for your court. You’ll need a level, rectangular area of ground. Ideally, it will be oriented north-south. This will minimize the effect of the sun shining in the players’ eyes.
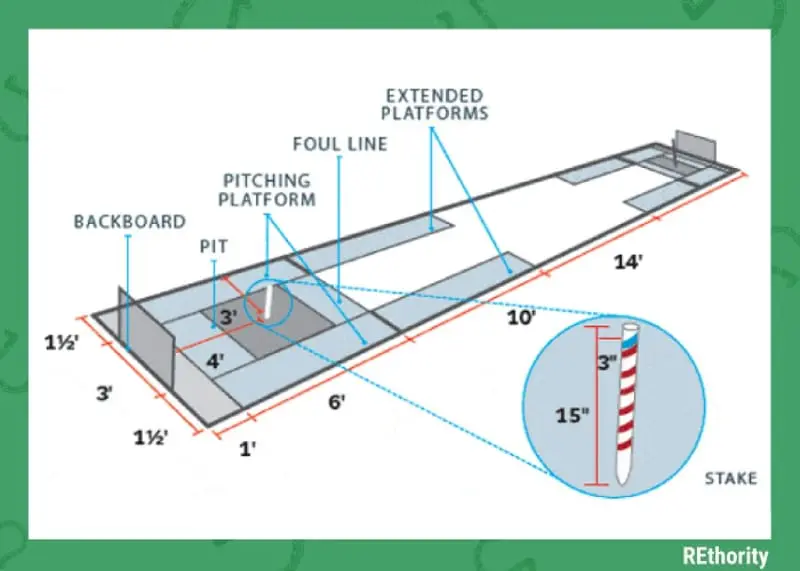
The minimum length required is determined by the distance between the stakes. The standard is 40 feet, although if space doesn’t permit, you can go shorter. You’ll also need an additional room at each end for the horseshoe pits.
Plan on four or so feet extra at each end for a total of 48 feet. The court dimensions also call for it to be six feet wide as well. And, ideally, there should be room for spectators to watch from the sides of the pit.
It’s not advisable to locate spectators at the rear of the pitching area. Tossed horseshoes that miss the metal stakes can bounce and roll at surprising distances.
So avoid putting people, pets, delicate plants, or breakable furnishings close behind either stake. In fact, you may want to build backstops to keep errant steel shoes from crashing into places you don’t want them.
Also, consider overhead clearance. Make sure there are no tree limbs, wires, or other objects less than 12 feet above the playing area. This will provide room for arcing shoes.
Horseshoe Court Materials and Tools


After you’ve picked your space, gather your materials and tools. You’ll need:
- Four horseshoes
- Two stakes
- 2 x 6 pressure-treated boards or similar framing for the pits
- Fasteners for the box frame, such as screws or spikes
- A saw for trimming the pit lumber
- Pit fill material, such as play sand
- A sledgehammer to drive in the stakes
- A shovel or trenching machine to embed the box framing
- Landscaping fabric to go under the pit fill material
Don’t plan to use actual horseshoes for shoeing horses. Instead, get a set purpose-made for pitching from any sporting goods store.
Official shoes will weigh about 2 1/2 lbs. each and have an opening no larger than 3 1/2 inches. The four shoes will be painted in two different colors to help contestants distinguish their shoes.
The stakes are made of soft steel or iron. They should be one inch in diameter and 36 inches long. You should get two stakes with your horseshoe set. If not, in a pinch, you can use two lengths of 1-inch-diameter iron rebar.
Sand is a cheap, readily available pit fill material that meets NHPA standards. The association will also approve clay, dirt, and some synthetic pit material.
The key is that the pit fill should be at least 4 inches deep. For in-ground pits such as the one described here, the NHPA recommends 8 inches of fill.
Building Your Horseshoe Pit
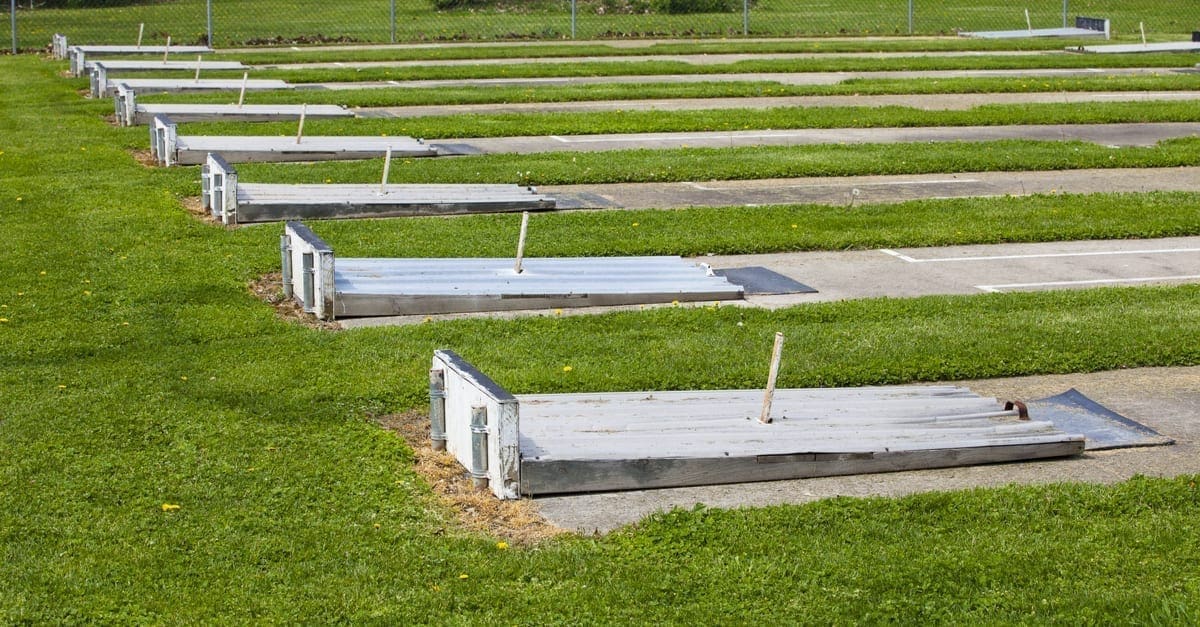
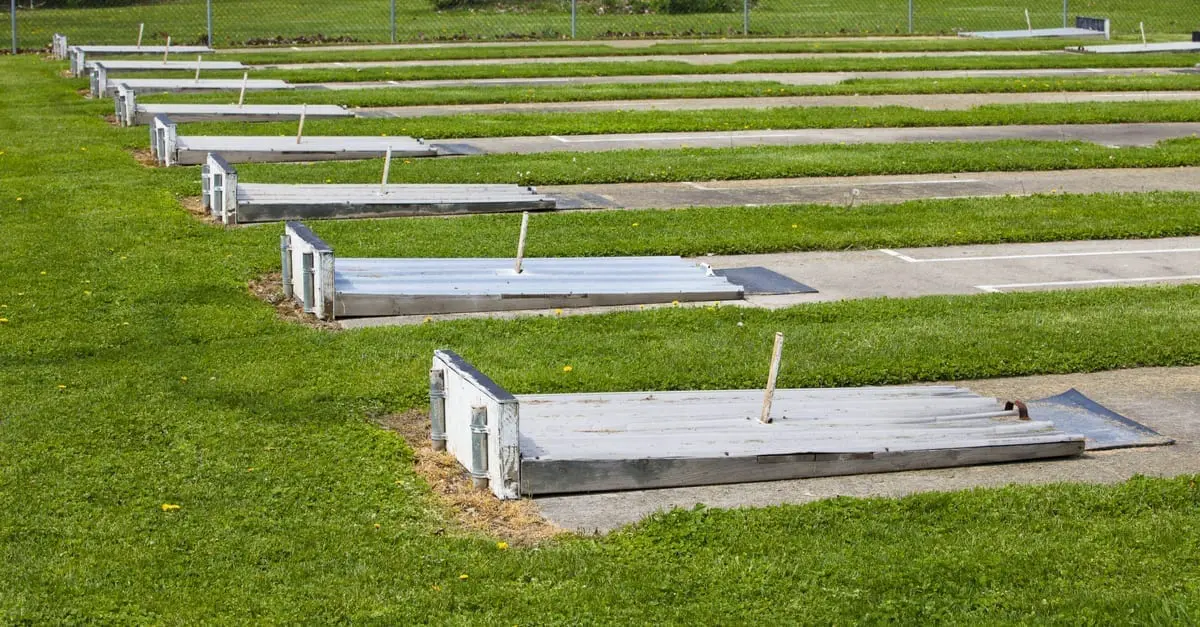
After setting your stakes 40 feet apart and marking the foul lines at 37 feet, it’s time to build the actual horseshoe pits. Each regulation horseshoe pit is between 43 and 72 inches long and 31 and 36 inches wide.
The exact horseshoe pit dimensions are up to you. They just have to be within those parameters.
1. Outline the Pit
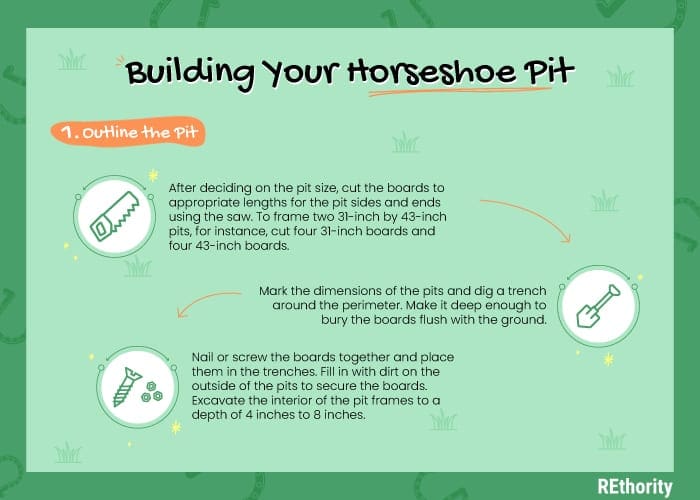
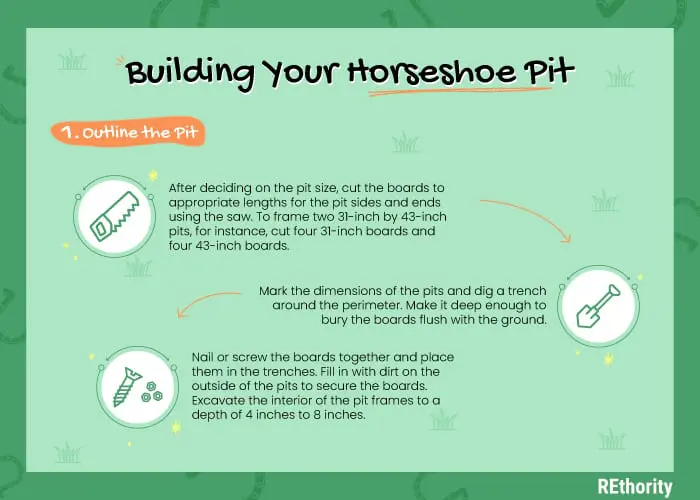
After deciding on the pit size, cut the boards to appropriate lengths for the pit sides and ends using the saw. To frame two 31-inch by 43-inch pits, for instance, cut four 31-inch boards and four 43-inch boards.
Mark the dimensions of the pits and dig a trench around the perimeter. Make it deep enough to bury the boards flush with the ground.
Nail or screw the boards together and place them in the trenches. Fill in with dirt on the outside of the pits to secure the boards.
Excavate the interior of the pit frames to a depth of 4 inches to 8 inches.
2. Fill with Sand
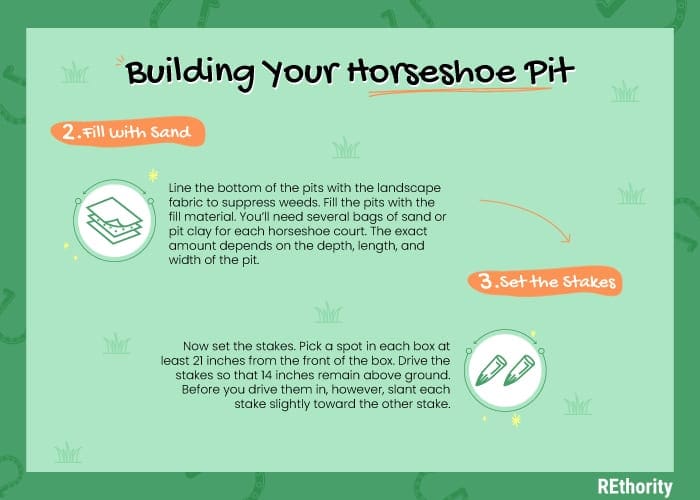

Line the bottom of the pits with the landscape fabric to suppress weeds. Fill the pits with the fill material.
You’ll need several bags of sand or pit clay for each horseshoe court. The exact amount depends on the depth, length, and width of the pit.
3. Set the Stakes
Now set the stakes. Pick a spot in each box at least 21 inches from the front of the box. Drive the stakes so that 14 inches remain above ground. Before you drive them in, however, slant each stake slightly toward the other stake.
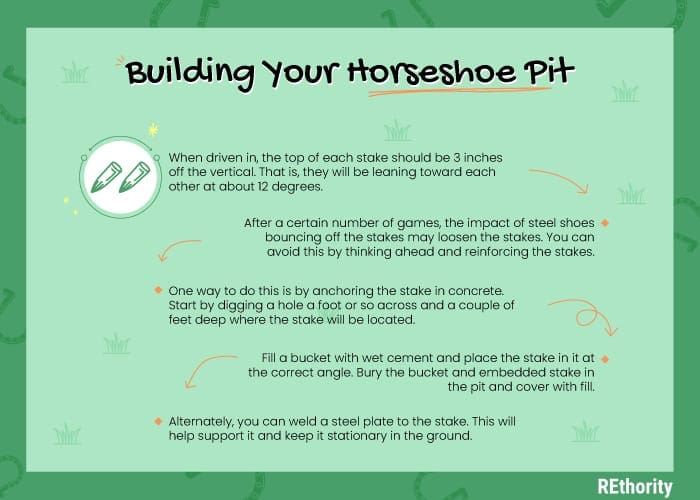
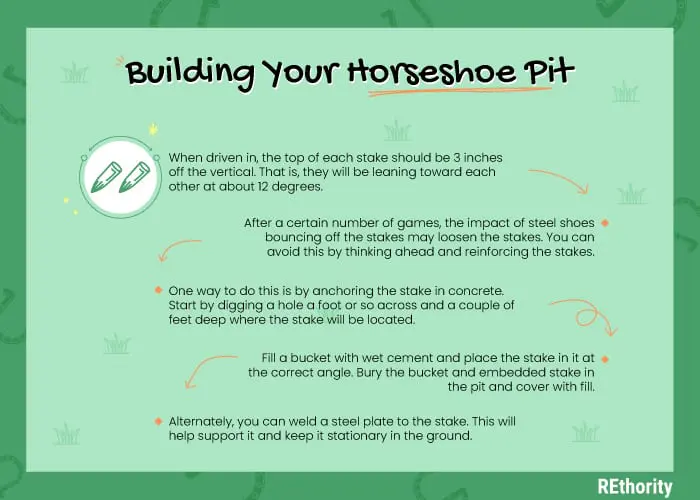
When driven in, the top of each stake should be 3 inches off the vertical. That is, they will be leaning toward each other at about 12 degrees.
After a certain number of games, the impact of steel shoes bouncing off the stakes may loosen the stakes. You can avoid this by thinking ahead and reinforcing the stakes.
One way to do this is by anchoring the stake in concrete. Start by digging a hole a foot or so across and a couple of feet deep where the stake will be located.
Fill a bucket with wet cement and place the stake in it at the correct angle. Bury the bucket and embedded stake in the pit, and cover with fill.
Alternatively, you can weld a steel plate to the stake. This will help support it and keep it stationary on the ground.
4. Build a Backstop
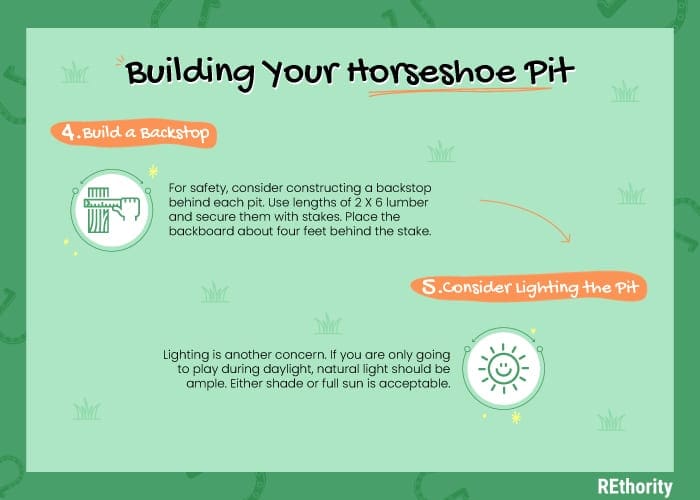

For safety, consider constructing a backstop behind each pit. Use lengths of 2 x 6 lumber and secure them with stakes. Place the backboard about four feet behind the stake.
5. Consider Lighting the Pit

Lighting is another concern. If you are only going to play during daylight, natural light should be ample. Either shade or full sun is acceptable.
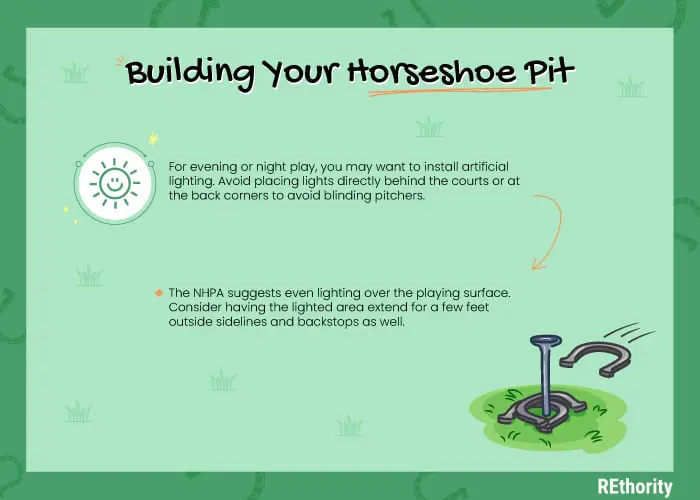
For evening or night play, you may want to install artificial lighting. Avoid placing lights directly behind the courts or at the back corners to avoid blinding pitchers.
The NHPA suggests even lighting over the playing surface. Consider having the lighted area extend for a few feet outside sidelines and backstops as well.
Horseshoe Court Construction Summary
A do-it-yourself horseshoe court doesn’t cost much and is easy to disassemble or relocate if necessary.
It is a relatively simple project that can provide people of all ages with hours of relaxed fun and friendly competition right in your own backyard.