
Mowing the lawn is so satisfying—until it isn’t. When you start noticing long patches on your lawn, it could be a sign that it’s time to remove and replace the blade.
But most homeowners don’t know how to remove a lawn mower blade. But don’t worry; we’ll show you exactly how to do it below. Read on to learn all you need to know.
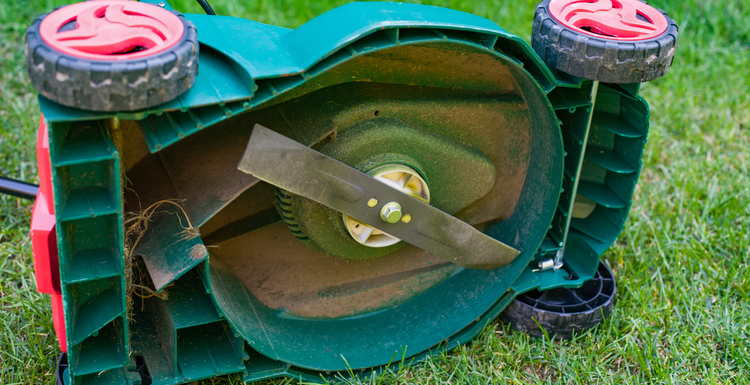
Wondering How to Remove a Lawn Mower Blade?


Virrage Images/Shutterstock
Removing a lawn mower blade can be a bit difficult and confusing the first time you do it. The good news is that the average lawn mower blade lasts for approximately 200 to 300 hours of mowing.
This means that your average blade can last up to 10 years—that’s a lot of mowing. But the time will come when it needs to be replaced.
Changing the blade on a riding mower is slightly different and requires more work than changing the blade on a push mower. Since a riding lawn mower is much larger, you will need a jack to raise the mower to access the blade.
This is the main difference in changing both lawn mower blades; a push mower does not require a jack.
Once you have the blade removed, you also have the choice of either sharpening the old blade or replacing it with a new blade. I tend to sharpen mine, but if you’ve hit rocks or debris, the blade may be damaged beyond repair.
Some people just don’t like the work of grinding metal and would rather shell out $30 for a pre-sharpened blade. I’ve gone that route too, and it’s by far the quickest.
Getting Started
To learn how to remove a lawn mower blade, follow our step-by-step guide below. This way, you can save a bit of money and learn how to remove a lawn mower blade on your own.
How to Remove Your Lawn Mower Blade
- First, inspect the lawn mower and blade for any damage. To do this, you have to turn the lawn mower on its side to access the blade underneath the mower.
- Next, tighten the fuel valve so there are no leaks (flipping your lawn mower upside down leaves the possibility of fuel leaking out). You can also take plastic wrap and place it over the cap for extra precaution.
- Place a piece of wood between the blade and mower housing to prevent the blade from turning when you loosen the bolts. Don’t skip this step.
- Next, disconnect the spark plug. When you inspect the blades and rotate them, there is no chance of the mower starting up. Once you have the fuel valve closed and the spark plug disconnected, you can begin inspecting.
- Once you have inspected the blades and the mower itself, you are ready to remove the blade. This can be done using different tools depending on what you have, but a ratchet spanner or wrench will work fine. Begin to loosen the bolts by turning them counterclockwise with your wrench.
- Once the bolts are out, you can carefully remove the blade and set it on the ground in the same direction it was taken off. This makes it easier to compare it to the new blade.
- Now you can either sharpen your old blade or install a new one by lining up the holes and retightening the bolts, securing the blade in place. Always make sure the cutting edge is facing upwards, so it shoots the grass up.
Frequently Asked Questions

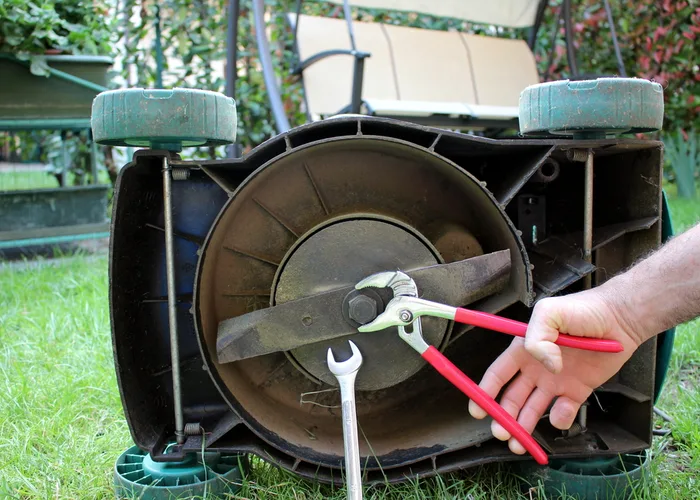
Carlo Villa/Shutterstock
What size wrench do I need to remove a lawn mower blade?
Typically, you will need a 15/16 inch wrench or socket tool to remove the blade retaining bolt. This is the average socket size; however, it can vary depending on the make and mower model.
Which way do you turn the bolt to remove a lawn mower blade?
You will use a wrench or socket tool to remove the bolt in a counterclockwise direction.
How do you loosen a nut on a lawn mower blade?
Using lots of force, take the right size socket tool and begin to loosen the nuts in a counterclockwise direction. This is the same process as removing a lawn mower blade bolt.